Technology is ever-evolving. Every day there are new ways to interact online and with those many points of access, open many doors for security issues. So, how does one stay on top of new tech while simultaneously protecting it? Just as tech is ever-evolving, so is our learning. In this guide, we will teach you the five steps you need to take to fully secure your email though Microsoft. While Microsoft has built-in features to protect you and yours, they aren't always configured "out of the box". This guide will show you just how to make the most of your current offerings and suggest some some free tools we use every day. At BEMO, we always want our customers to feel empowered. So, while we are happy to configure your email security or manage your migrations, we also want to educate you so you have the option to do it yourself. So, without further ado, here is your complete guide to Microsoft email security.

The 5 Steps to Complete Microsoft Email Security:
Below you'll find the five steps to email security with Microsoft. We recommend they be done in the order provided. You can click on any of the links below to navigate to a specific section.
- STEP ONE: Configure DKIM, DMARC, SPF
- STEP TWO: Deploy EOP (Exchange Online Protection)
- STEP THREE: Set up Office Message Encryption
- STEP FOUR: Enable Defender Office 365
- STEP FIVE: Enable Office 365 MFA with Authenticator App
STEP ONE: Configure DKIM, DMARC, SPF
DKIM, DMARC and SPF? If these sound more like a boy band member nicknames or tech style gibberish to you don't worry! We will explain these acronyms, tell you why they're important and show you how to enable them. Plus, we will show you some (free!) tools, like MxToolbox, to use to make sure they are working correctly. Every day we use different tools, like MxToolbox, to make sure our clients' emails are protected and to ensure we have enabled DKIM (DomainKeys Identified Mail), and DMARC (Domain-based Message Authentication, Reporting & Conformance) and SPF (Sender Policy Framework) and after this explanation, you will be able to manage your company's emails with confidence as well. Let’s get started!
MxToolbox
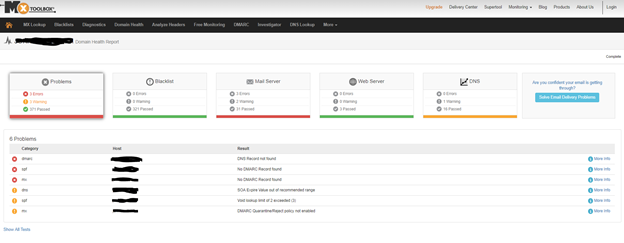
This tool offers monitoring and lookup solutions to help IT teams assess the overall health of their company's DNS by means of 158 different tests that can completed in seconds. We use it everyday to determine the health of our leads, our clients, and our own network.
- Go to https://mxtoolbox.com/
- Select Domain Health
- Type your company domain
- Wait 30 seconds for MxToolbox to run over 158 tests against: Blacklisted domains, MX records, DMARC entries, SMTP, SPF, web servers, DNS entries, and DNS servers
Setting up SPF
What is an SPF record?
A Sender Policy Framework (SPF) record is a type of Domain Name System (DNS) record that can help to prevent email address forgery. Spammers can falsify email headers to make it look like they're sending from an email address on your domain. They can pretend to be you, allowing them to phish your users for private account information, or otherwise abuse your reputation. When they hijack an email account, they alter the email header details to show the messages they're sending are coming from the valid owner of the account.
Adding an SPF record can help prevent others from spoofing your domain. You can specify which mail servers are permitted to send an email on behalf of your domain. Then, when incoming mail servers receive email messages from your domain name, they compare the SPF record to the outgoing mail server information. If the data doesn't match, they identify the email message as unauthorized, and will generally filter it as spam or reject it.
Adding an SPF record can decrease spoofing attempts to your domain; however, they are not a full-proof guarantee against all spam.
Considerations for setting the SPF
To correctly set the SPF for your domain, answer the following two questions:
From what server or servers will email from the domain originate?
If you’re sending email from your workstation by using your internet service provider’s (ISP) mail servers, you might want to consider their servers. You must take all possible (legitimate) sending servers into account.
How do you want illegitimate email to be handled?
Do you want it to be rejected outright, or do you want the message to be classified as a soft fail, meaning that the email will be subjected to further scrutiny?
Create an SPF rule
The example in this section assumes that you have the following considerations for your email on a specific domain:
- The authorized servers are your cloud server (that is, the incoming mail exchange (MX) details also send mail) and Microsoft Exchange Online mail.
- No other servers are authorized.
In this situation, you would create the following rule and add it to a TXT record:

The following list shows how each part of the record is defined:
- v=spf1
Sets the SPF version that is used. - include:spf.protection.outlook.com
Includes Microsoft Exchange online servers as authorized servers. - -all
Indicates that servers that are not listed previously are not authorized to send an email. If an unauthorized server does send an email, the action is taken according to the receiving mail server’s policy. For example, the email is deleted or marked as spam.
About the SPF all settings
The all setting is an essential aspect of the record and has the following basic markers:
- -all: Any server that is not previously listed is not authorized to send an email.
- ~all: If mail is received from a server that is not previously listed, it is marked as a soft fail, which allows the email to be scrutinized further.
How to add an SPF record to protect your email
A Sender Policy Framework (SPF) record is a type of Domain Name Service (DNS) TXT record that identifies which mail servers are permitted to send an email on behalf of your domain. The purpose of an SPF record is to detect and prevent spammers from sending messages with forged From addresses on your domain.
- Go to your DNS provider (i.e., GoDaddy, Network Solutions, etc.)
- Go to the DNS Management page. As every DNS provider has a different interface, you will need to find the location of your DNS editor
- Select to add a next TXT entry
- Complete the following fields:
- Record Type: TXT
- Hostname: Enter the hostname for the TXT record (For example, type @ to map the record directly to your domain name, or enter the subdomain of your hostnames (labeled Host), such as www or ftp.)
- TXT Value: Enter the value you want to assign to the record.
- Note: For a TXT SPF record, enter the SPF rule in the TXT Value field. For example, enter v=spf1 mx -all to indicate that all email is sent from this server and no other mail servers are authorized.
- TTL: Specify the Time to Live (TTL). Usually, I use 3600 as value
- Save the record.
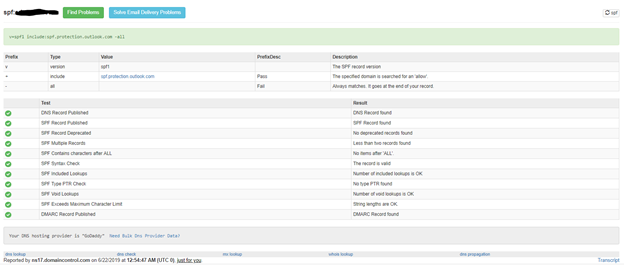
SPF Test
To test your SPF, go to https://mxtoolbox.com/spf.aspx and enter your domain. If set correctly, your SPF will pass for its tests as shown below
Setting up DKIM
What is DKIM?
DomainKeys Identified Mail (DKIM) is an email authentication method designed to detect forged sender addresses in emails (email spoofing), a technique often used in phishing and email spam.
DKIM allows the receiver to check that an email claimed to have come from a specific domain was indeed authorized by the owner of that domain. It achieves this by affixing a digital signature, linked to a domain name, to each outgoing email message. The recipient system can verify this by looking up the sender's public key published in the DNS. A valid signature also guarantees that some parts of the email (possibly including attachments) have not been modified since the signature was affixed. Usually, DKIM signatures are not visible to end-users, and are affixed or verified by the infrastructure rather than the message's authors and recipients.
How Do I Setup DKIM with Microsoft Office 365?
First, for each domain, you will need to create two CNAME records in your public DNS Zone. To build the CNAME records, you will use the following format:
selector1-<domainGUID>._domainkey.<inititalDomain>
The <domainGUID> will be the first part of the MX record as listed for Exchange Online. For example, to enable Domain Name "contoso.com" for DKIM, I will look up the MX record (you can use https://mxtoolbox.com/MXLookup.aspx to find the MX record), and see that the MX record points to:
- contoso.com
- MX preference = 0
- mail exchanger = contoso-com.mail.protection.outlook.com
You take the first part, “contoso-com”, and leave off the “.mail.protection.outlook.com”. The <InitialDomain> is the prefix part of your tenant name. In this case, the tenant domain is contoso.onmicrosoft.com. So, the <initialdomain> is contoso.
Now, to see it all together, you will build it as follows:
- selector1._domainkey.contoso.com. CNAME selector1-contoso-com._domainkey.contoso.onmicrosoft.com
- selector2._domainkey.contoso.com. CNAME selector2-contoso-com._domainkey.contoso.onmicrosoft.com
How to add the DKIM record to the DNS
- Go to your DNS provider (i.e., GoDaddy, Network Solutions, etc.)
- Go to the DNS Management page. As every DNS provider has a different interface, you will need to find the location of your DNS editor
- Select to add a next CNAME entry
- Complete the following fields:
- Record Type: CNAME
- Hostname: Enter selector1._domainkey as the hostname for the CNAME record.
- TXT Value: Enter the value you want to assign to the record
selector1-contoso-com._domainkey.contoso.onmicrosoft.com - TTL: Specify the Time to Live (TTL). Usually, I use 3600 as value
- Save the record
Now that you have created the DKIM first record. You will need to repeat the same steps and enter a second record as shown below.
- Select to add a next CNAME entry
- Complete the following fields:
- Record Type: CNAME
- Hostname: Enter selector2._domainkey as the hostname for the CNAME record.
- TXT Value: Enter the value you want to assign to the record
selector2-contoso-com._domainkey.contoso.onmicrosoft.com - TTL: Specify the Time to Live (TTL). Usually, I use 3600 as value
- Save the record
Once done, you should see something similar within your DNS editor (below, I am using GoDaddy)

How to validate that the DKIM entries to the DNS have been saved
Now let’s validate that your DKIM entries have been configured corre
ctly. Here is what you currently have:
- selector1._domainkey.contoso.com. CNAME selector1-contoso-com._domainkey.contoso.onmicrosoft.com
- selector2._domainkey.contoso.com. CNAME selector2-contoso-com._domainkey.contoso.onmicrosoft.com
Part 1: You need to verify that the two DKIM CNAME records were successfully published + the CNAME “redirect” process is successfully implemented
- Use the MxToolboxsite, for verifying information about the DKIM CNAME record that you published. To perform a CNAME look, you will use the following link – MXTOOLBOX CNAME record lookup
- To verify that your CNAME record was successfully published, and in addition, perform the required “redirection,” you will need to provide the “first part” of the CNAME record. In our specific scenario, the host name is “_domainkey.contoso.com"
- In the result’s pen, you can see that the “CNAME redirection” process, was successfully completed.
- Run the same test with “selector2._domainkey.contoso.com"
Part 2: Verify the “content” of the Office 365 DKIM text record that represents the public domain name.
- To be able to perform this test, you need to know the Host name of the “real Office 365 DKIM selector” host name. In this scenario, you query the public DNS about the content of a “TXT DNS record.”
- To perform a query about a TEXT record, use the following link – MXTOOLBOX TXT record lookup
- In our scenario, you look at a TXT record that uses the following host name:
selector1-contoso-com._domainkey.contoso.onmicrosoft.com
The results include the information that is “stored” in the TXT record. In our case, the Office 365 TXT record stores the Public key of the Office 365 DKIM selector, that represent our domain name.
Part 3: Additional methods for verifying DKIM DNS records
When using the DKIM records lookup, you will need to provide:
- The domain name that uses DKIM services, in our example contoso.com
- The host name of our DKIM selector in our example – selector1
Enable DKIM on Office 365
Once you have the DNS records in place and have verified, they are publicly accessible, go to:
- https://admin.microsoft.com
- Go to Admin Exchange Center -> Protection -> DKIM
- click ENABLE
- Once you have clicked, do not close the window. Note that it can take 1 hour before you can enable. If you can successfully pass all the test above, your DKIM set up should be completed within one hour.
Setting up DMARC
What is DMARC?
Domain-based Message Authentication, Reporting & Conformance (DMARC), is an email authentication, policy, and reporting protocol. It builds on the widely deployed SPF and DKIM protocols, adding linkage to the author (“From:”) domain name, published policies for recipient handling of authentication failures, and reporting from receivers to senders, to improve and monitor protection of the domain from fraudulent email.
Considerations for setting up DMARC
DMARC policies define how SPF and DKIM records should be handled by email servers. A critically important element of DMARC policy is that it also provides a reporting mechanism so domain administrators can identify if email is failing or if an attacker is attempting to spoof a given domain.
Create a DMARC rule
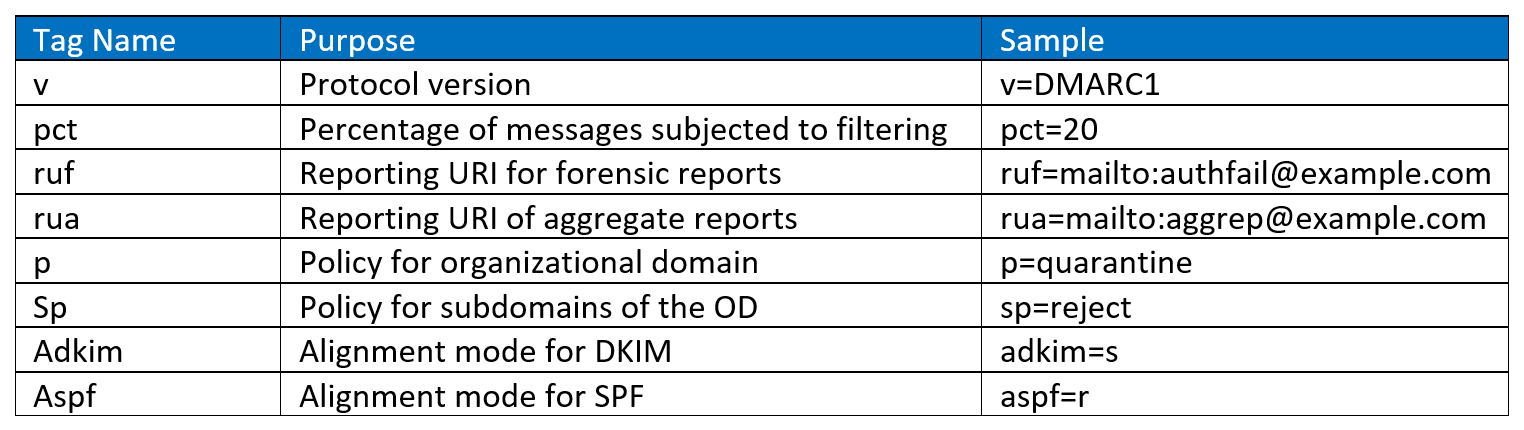
DMARC policies are published in the DNS as text (TXT) and announce what an email receiver should do with non-aligned mail it receives. DMARC records follow the extensible “tag-value” syntax for DNS-based key records defined in DKIM. The following chart illustrates some of the available tags:
Example #1
v=DMARC1; p=quarantine; rua=mailto:reports@contoso.com; ruf=mailto:reports@contoso.com; adkim=r; aspf=r; rf=afrf
- The "p" option has three options for how email that violates policies should be handled:
- None
- Quarantine
- reject,
- The adkim and aspf options define how strictly DKIM and SPF policy should be applied, with 's' indicating strict and 'r' indicating relaxed
- The RUA provides an address for aggregate data reports, while the RUF provides an address for forensic reports
Example #2:
v=DMARC1; p=quarantine; pct=100
- policy specifies what policy you want the receiving server to follow if DMARC fails. You can set the policy to none, quarantine, or reject.
- pct=100 indicates that this rule should be used for 100% of email.
How to add a DMARC entry within my DNS
- Go to your DNS provider (i.e., GoDaddy, Network Solutions, etc.)
- Go to the DNS Management page. As every DNS provider has a different interface, you will need to find the location of your DNS editor
- Select to add a next TXT entry
- Complete the following fields:
- Record Type: TXT
- Hostname: Enter _dmarc as the hostname for the TXT record.
- TXT Value: Enter the value you want to assign to the record.
v=DMARC1; p=quarantine; pct=100 - TTL: Specify the Time to Live (TTL). Usually, I use 3600 as value
- Save the record
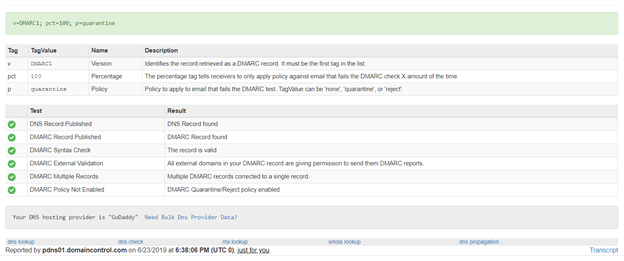
DMARC testing
To check that you have correctly set your DMARC, do the following steps:
- Go to https://mxtoolbox.com/dmarc.aspx
- Enter your domain name and click DMARC lookup
- You will get a screen as shown below with the validation of the rules you have put in place
That’s it! You have now successfully implemented SPF, DKIM and DMARC for your domain. By implementing enabling these tools, you have drastically reduced the probability of your company becoming a victim of a data breach via email.
How did it go? Leave your questions or comments below or reach out for a 15-minute meeting.
Now, onto Step Two.
STEP TWO: Deploy EOP (Exchange Online Protection)
Next up: set up Anti-Spam and Anti-Malware with EOP (Exchange Online Protection). Follow these steps:

Part 1 - Exchange Online Protection Anti-Spam
- Go to https://protection.office.com/
- Click on Anti-Spam
- Make sure that standard settings is turned on
- Go to Exchange Admin Center
- Click on Protection
- Click on Spam Filter
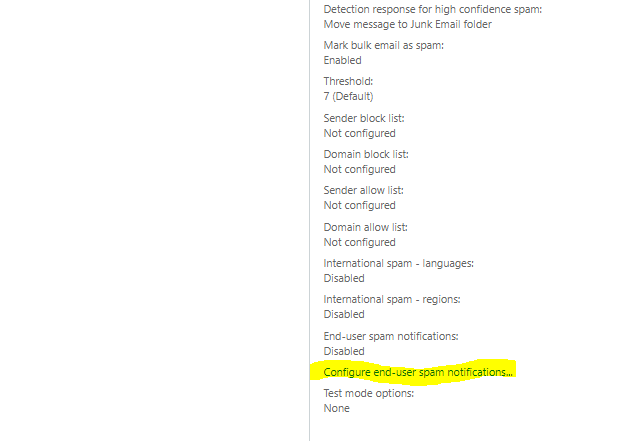
- Click on Configure end-user spam notification
- Click on Enable end-user spam notification
- Leave the Send end-user spam notifications every (days) to 3
- Click Save
You are done with setting up Anti-spam!
Microsoft Exchange Online Protection - Anti-malware
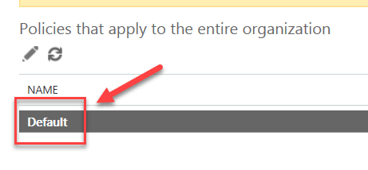
- Click on Anti-malware
- Click on Default
- A popup window will open
- Click on Settings
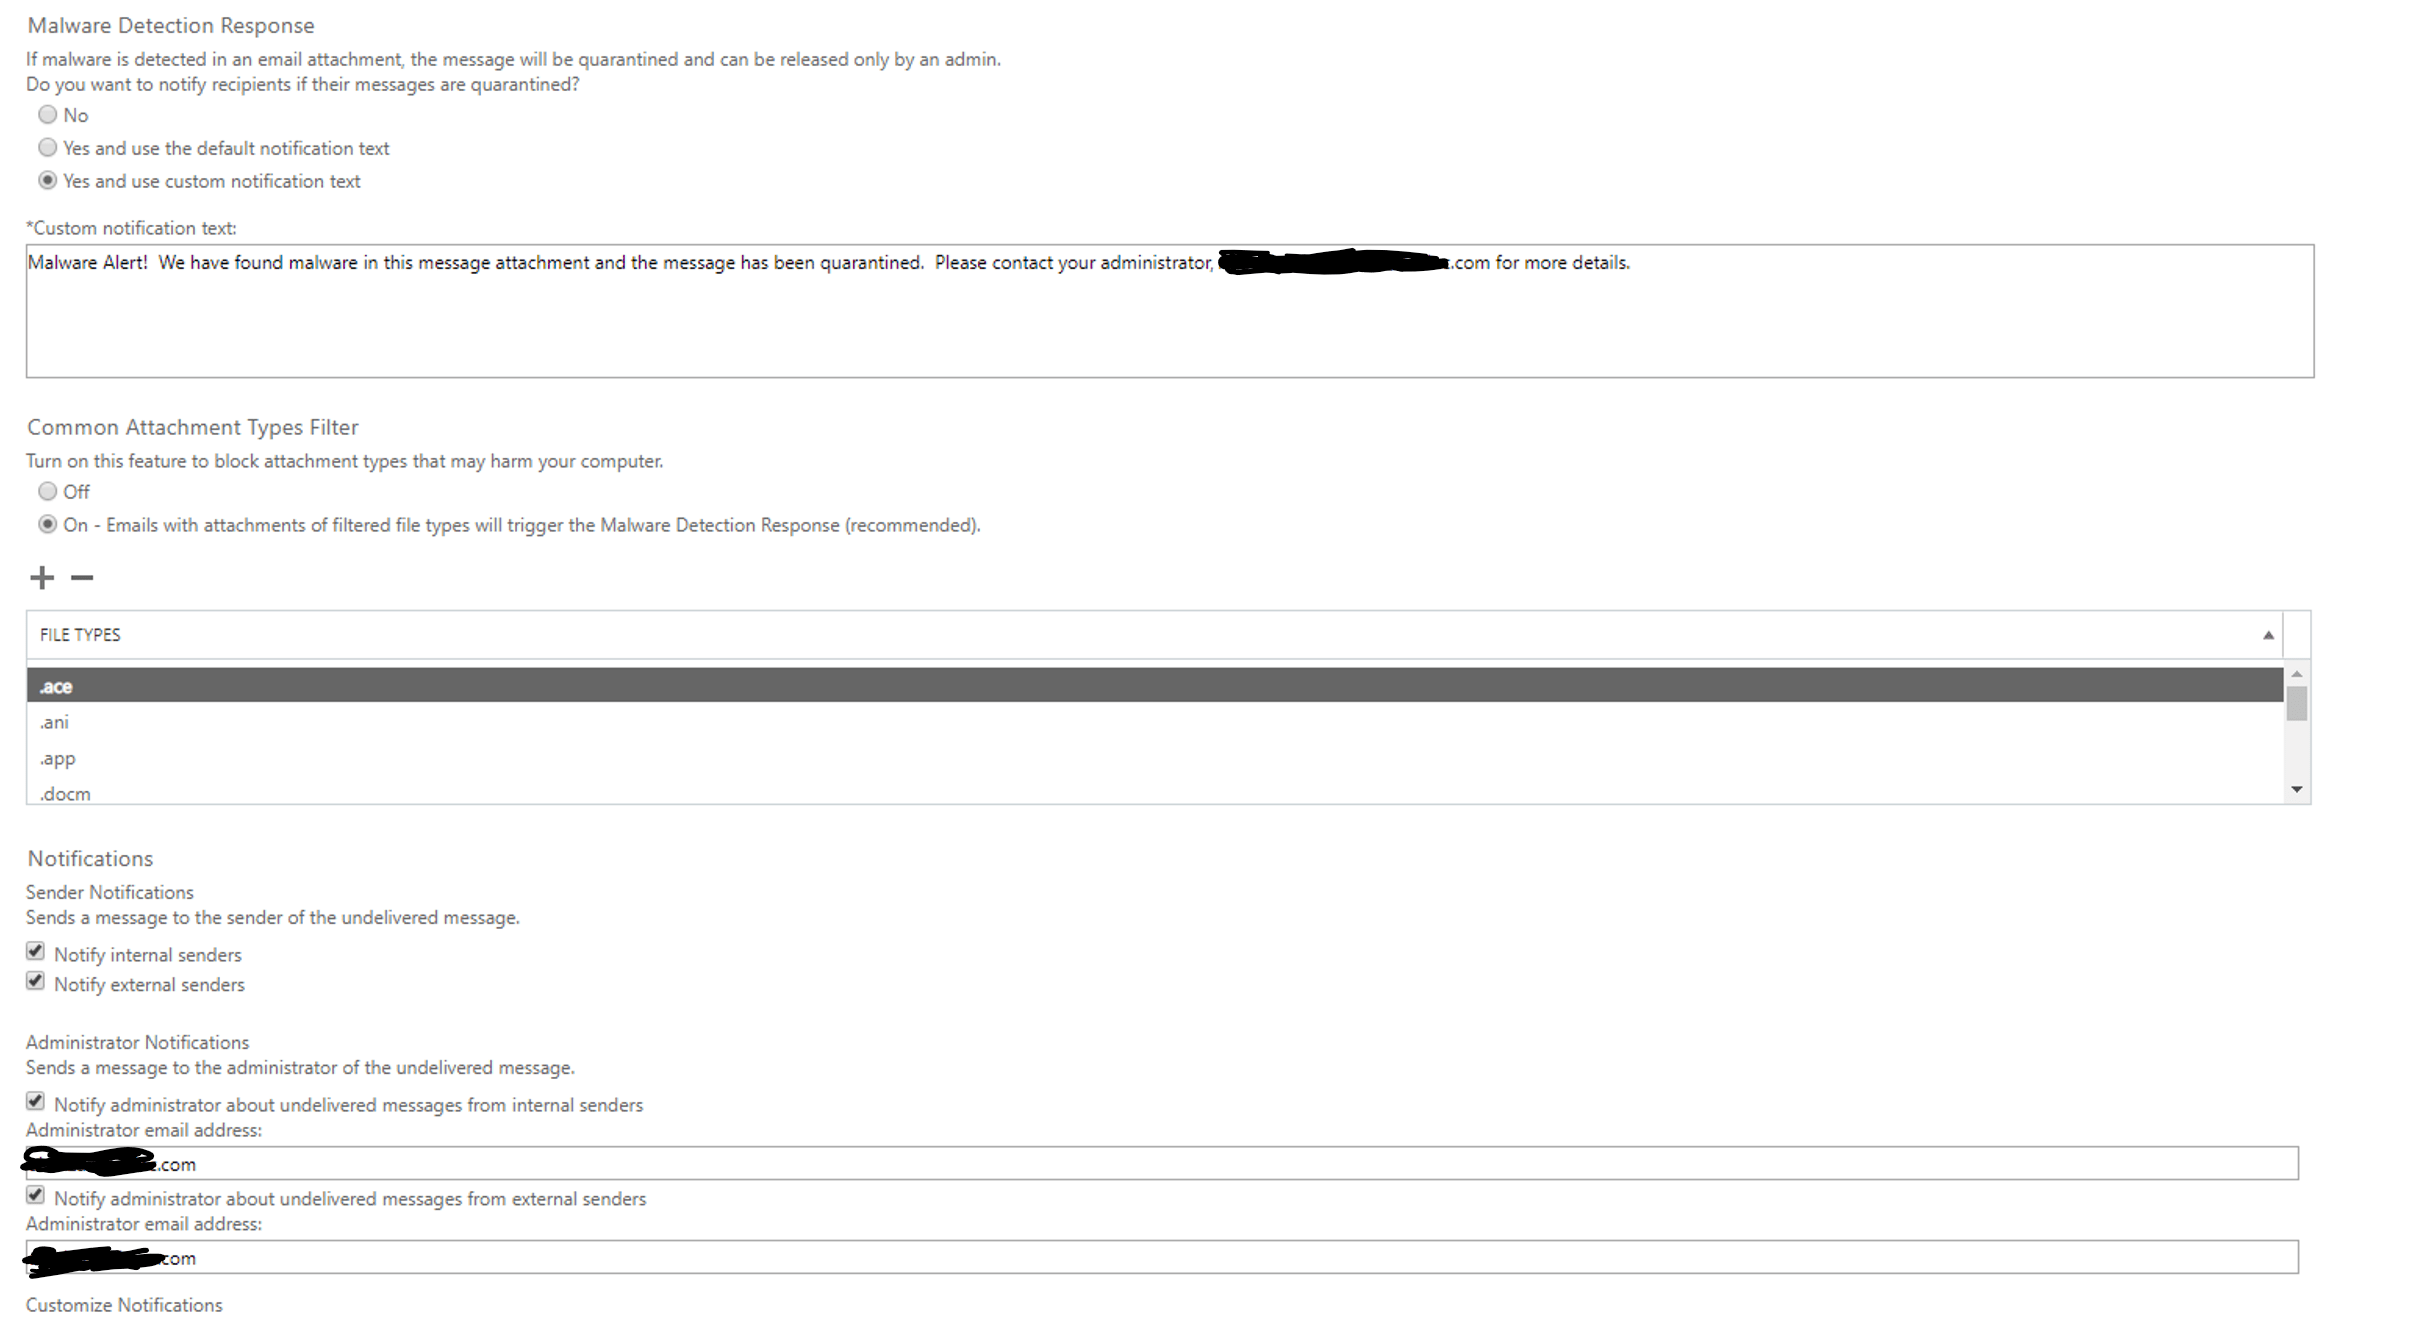
I would advise the following:
- Under Malware Detection Response, select Yes and use custom notification text.
- In the text box, you could type something like "Malware Alert! We have found malware in this message attachment and the message has been quarantined. Please contact your administrator, John Doe, at johndoe@microsoft.com for more details"
- Under Common Attachment Types Filter, select On - Emails with attachments of filtered file types will trigger the Malware Detection Response (recommended).
- Under Notifications, select Notify internal senders and Notify external senders
- Under Administrator Notifications, select Notify administrator about undelivered messages from internal senders and Notify administrator about undelivered messages from external senders
- Add the administrator email address that should receive the notification
- Click Save
Set Outbound Spam Notifications
First, you will need to create a new contact within Office 365 in order to have someone receive notifications, or at least apply this rule to the current Global Admin.
- Go to Admin Center
- Select Users
- Select Contacts
- Click add a contact
- enter contact info (this example uses BEMO, but this would be your IT contact or Global Admin)

- Click save
- Select Groups
- Click on Groups
- Click on add a group
- Under Type, select Distribution List
- Under Name, type "Company Name" IT Team
- Click Add
- Click Close
- Select Groups
- Click on Groups
- Within the 'View' drop down list, select Distribution list
- Add an Owner (add your Global Admin of the company as the Owner of the Distribution Group)
- Click close
- Go to Exchange Admin Center
- Open Protection
- Go to https://protection.office.com/antispam
- Expand the Outbound spam policy and click on Edit Policy
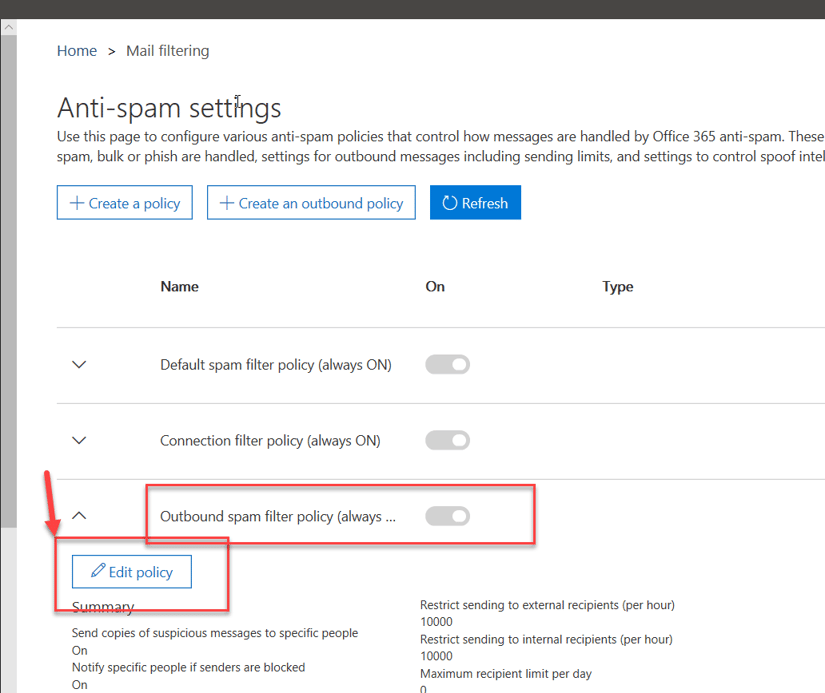
- Under Notifications, check mark the two options "
- Send a copy of suspicious outbound email messages to specific people." and "
- Notify specific people if a sender is blocked due to sending outbound spam." and click on Add People.
- Enter the email you want the notification to go to
- Open the default policy (or any other policy)
- Select Outbound spam preferences
- Check mark the Send a notification to the following email address or addresses when a sender is blocked for sending outbound spam check box
Now if any of your mailboxes are sending out spam you will know about it!
Not looking to do this yourself?
Schedule a meeting with us to learn more about implementing Exchange Online Protection and all the other email security tools offered by Microsoft.
Next up? Step Three:STEP THREE: Set up Office Message Encryption
It's time to configure Office Message Encryption. Be prepared, these instructions aren't for the faint at heart! Enabling OME is much more difficult than the other Microsoft email security products but hopefully these steps will make it as pain-free as possible!
So, Do I Really Need Security?
No, these steps aren't easy but...short answer: yep. You need security.

If you're still not convinced why you need email security Microsoft breaks it down here nicely:
"People often use email to exchange sensitive information, such as financial data, legal contracts, confidential product information, sales reports and projections, patient health information, or customer and employee information. As a result, mailboxes can become repositories for large amounts of potentially sensitive information and information leakage can become a serious threat to your organization." So, let's learn a bit about OME, shall we?
What is Office Message Encryption (OME)?
Office Message Encryption (OME) allows your organization to send and receive encrypted messages, even to people outside of your organization. Encryption makes it so that only your intended audience can view the sensitive information your messages contain.
Setting Up Office 365 Message Encryption
Alright, now that we've got the basics under our belts, let's get started!
- Go to https://portal.office.com
- Sign in with Global Admin credentials
- Click on Admin
- Click on Settings
- Click on Services & add-ins
- Click on Microsoft Azure Information Protection
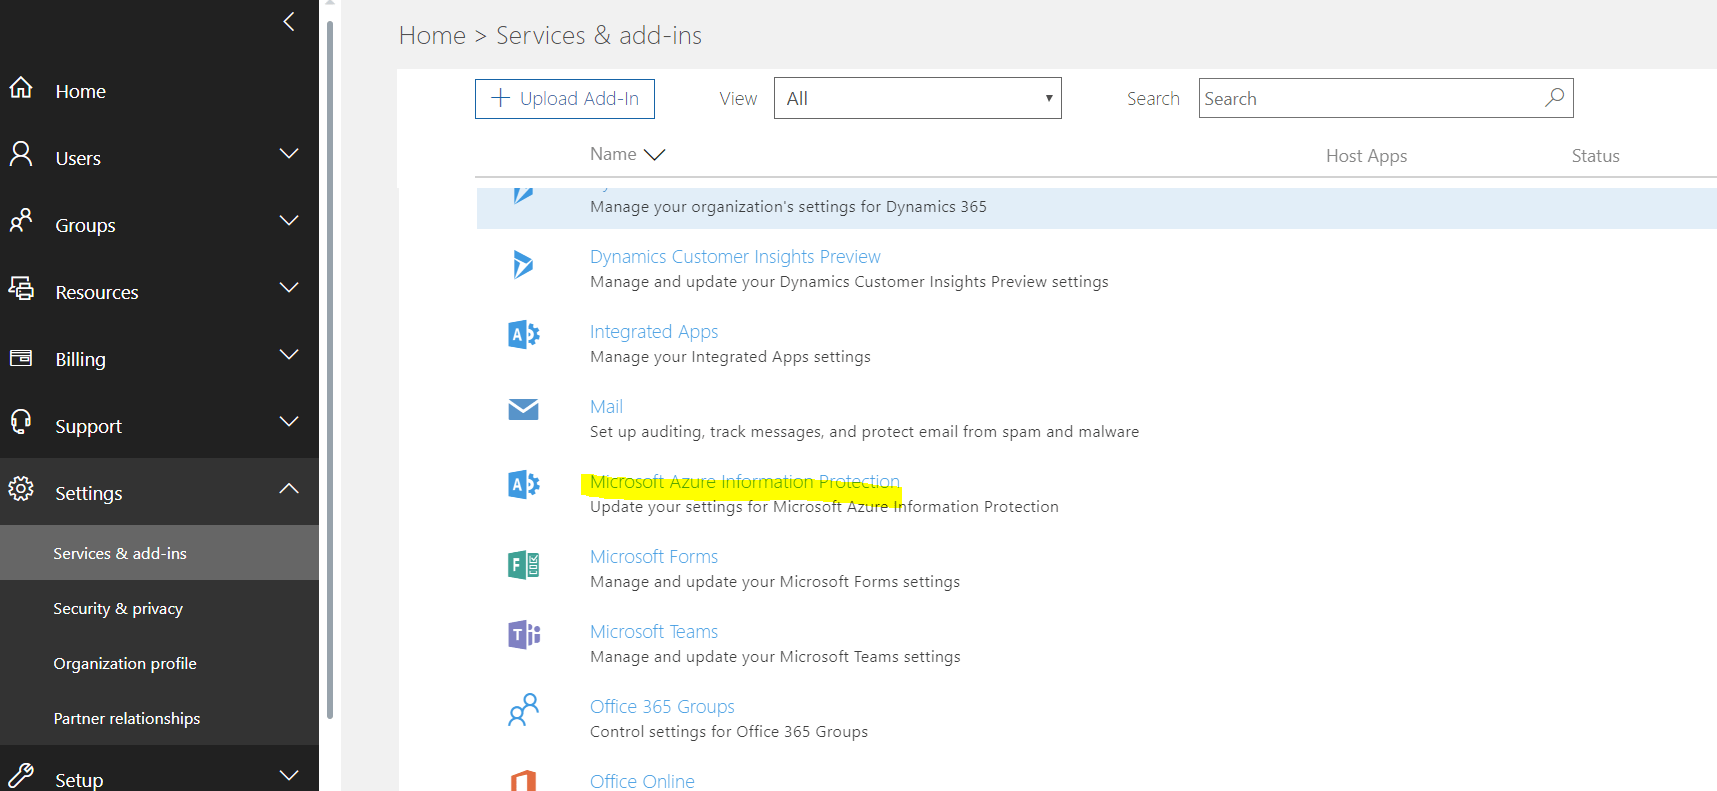
You will be sent to:

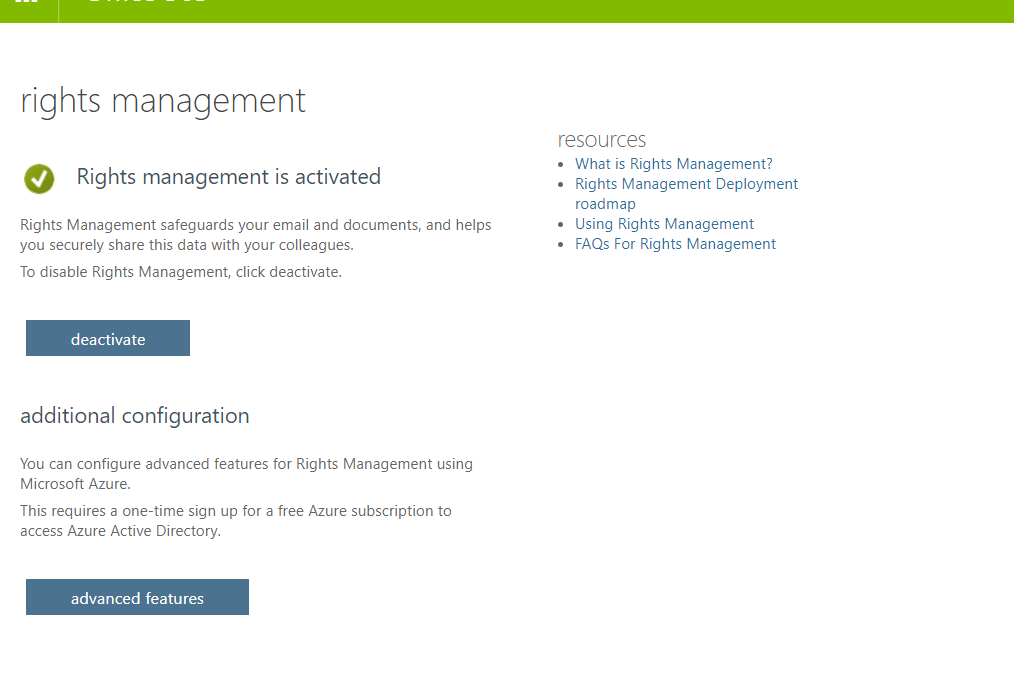
- Click on Manage Microsoft Azure Information Protection setting
- Make sure that Rights Management is activated (if not, please activate it)
 If your organization uses multi-factor authentication (MFA) to connect to Exchange Online PowerShell, follow the instructions: MFA requires you to install the Exchange Online Remote PowerShell Module, and use the Connect-EXOPSSession cmdlet to connect.
- Get to the Exchange admin center
- You must have Office 365 admin permissions to access the Exchange admin center.
- You need to use Edge - Chrome does not work
- Sign in to Office 365 using your work or school account, and then choose the Admin tile.
- In the Office 365 admin center, choose Admin centers > Exchange.
- Click Hybrid
- Click the Configure button under The Exchange Online PowerShell Module supports multi-factor authentication. Download the module to manage Exchange Online more securely.
You will get the following prompt:

- Click Open
- The following screen will appear
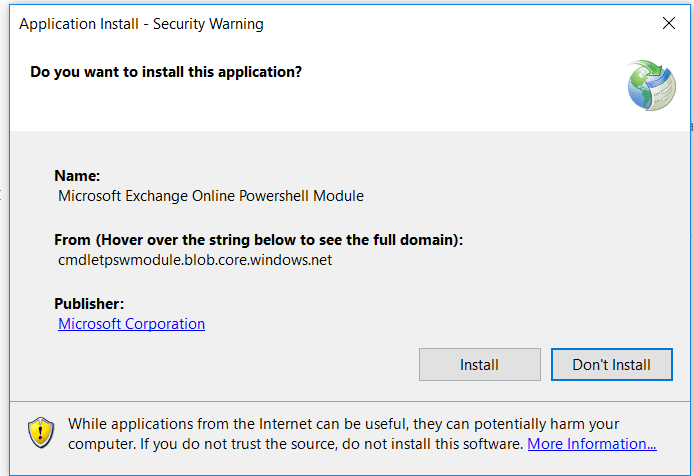
-
Click Install
-
Once done, a similar screen will open
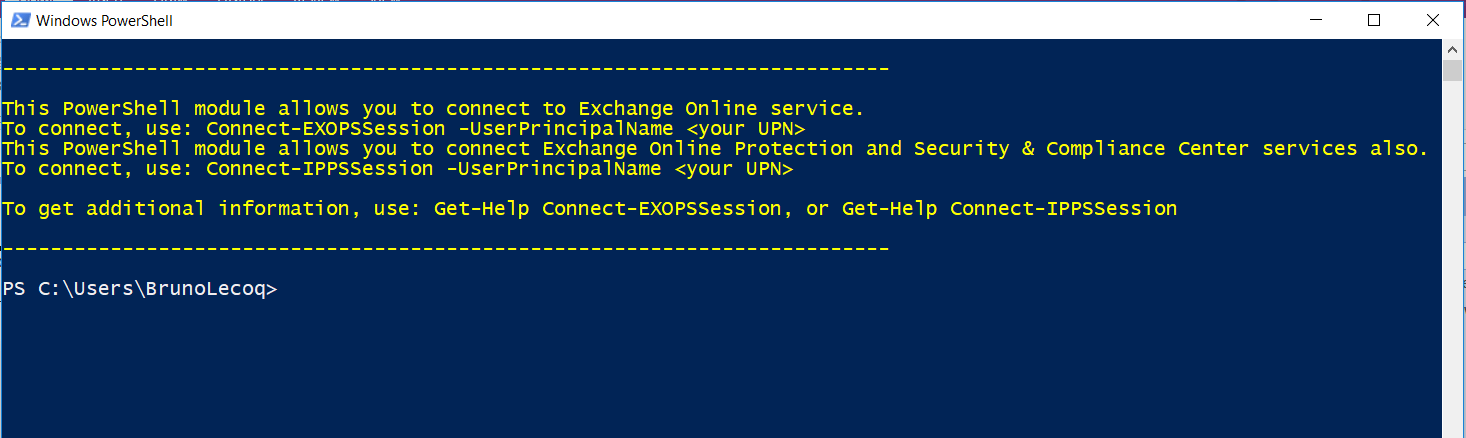
- You can now close the screen above
- Windows Remote Management (WinRM) on your computer needs to allow basic authentication (it's enabled by default). To verify that basic authentication is enabled, do the following:
- Open a Command Prompt Session (as an Admin)
- Run this command in a Command Prompt:
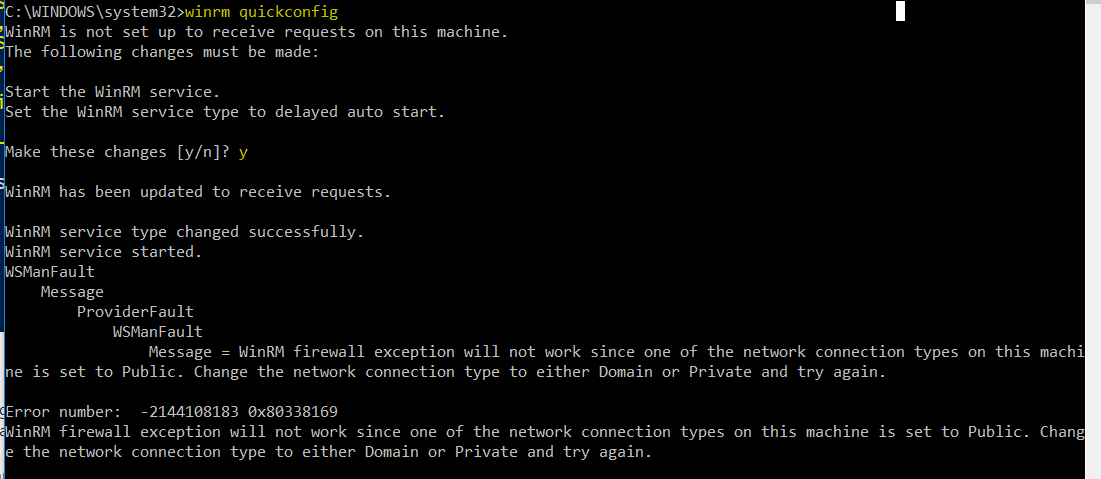
- Winrm quickconfig
- Answer Y to Make these changes [y/n]
- You will likely get the error below - just ignore
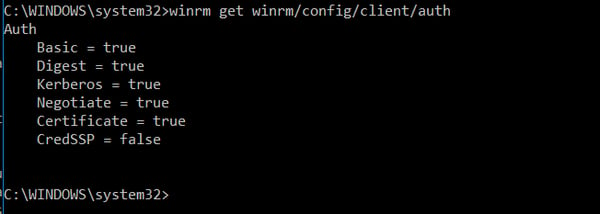
- Type: winrm get winrm/config/client/auth
- If you don’t see the value Basic = true, you need to run this command to enable basic authentication for WinRM:
winrm set winrm/config/client/auth @{Basic="true"}
- If you don’t see the value Basic = true, you need to run this command to enable basic authentication for WinRM:
- If basic authentication is disabled, you'll get this error when you try to connect:
- he WinRM client cannot process the request. Basic authentication is currently disabled in the client configuration. Change the client configuration and try the request again.
Once done, you should see the screen below
Connect to Exchange Online PowerShell by using MFA
- On your local computer, open the Exchange Online Remote PowerShell Module (Microsoft Corporation > Microsoft Exchange Online Remote PowerShell Module).
- The command that you need to run uses the following syntax:
- Connect-IPPSSession -UserPrincipalName <username>@bemopro.com
Once logged in, you will get a screen similar to:

- You will now need to import the newly installed modules.
- Import-Module AADRM
- Import-Module AADRM
- To see which cmdlet is available for the newly imported module type the following.
- Get-Command -Module ADDRM
- Get-Command -Module ADDRM
- To get started we need to connect to Azure RMS, type the following cmdlet and enter the credentials of a Global Administrator.
- Connect-AadrmService
- Now that we have a successful connection establish with Azure RMS, we can go ahead and run the following Cmdlet to Enable Azure RMS.
- Enable-Aadrm
- Get the configuration information needed for message encryption.
- $rmsConfig = Get-AadrmConfiguration
$licenseUri = $rmsConfig.LicensingIntranetDistributionPointUrl
- $rmsConfig = Get-AadrmConfiguration
- Disconnect from the service.
- Disconnect-AadrmService
- Create a remote PowerShell session and connect to Exchange Online.
Connect-EXOPSSession -UserPrincipalName <username>@bemopro.com - Collect IRM configuration for Office 365
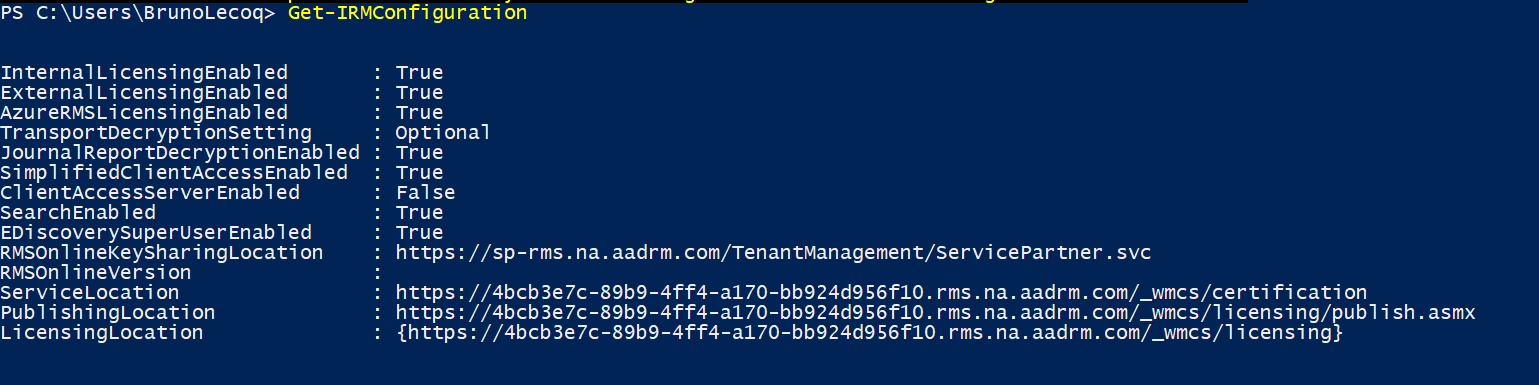
- $irmConfig = Get-IRMConfiguration
$list = $irmConfig.LicensingLocation
if (!$list) { $list = @() }
if (!$list.Contains($licenseUri)) { $list += $licenseUri }
- $irmConfig = Get-IRMConfiguration
- Enable message encryption for Office 365
- Set-IRMConfiguration -LicensingLocation $list
Set-IRMConfiguration -AzureRMSLicensingEnabled $true -InternalLicensingEnabled $true
- Set-IRMConfiguration -LicensingLocation $list
- Enable server decryption for Outlook on the web, Outlook for iOS, and Outlook for Android.
- Set-IRMConfiguration -ClientAccessServerEnabled $true
- Set-IRMConfiguration -ClientAccessServerEnabled $true
- Once done, run the following test
- Test-IRMConfiguration –sender <username>@bemopro.com

12. Disable IRM templates in OWA and Outlook
-
- Set-IRMConfiguration -ClientAccessServerEnabled $false
13. View the IRM Configuration
Office Message Encryption - Things to Consider
1) You need to enable Google, Yahoo, and Microsoft Account recipients to use these accounts to sign in to the Office 365 Message Encryption portal
By default, when you set up the new Office 365 Message Encryption capabilities, users in your organization can send messages to recipients that are outside of your Office 365 organization. If the recipient uses a social ID such as a Google account, Yahoo account, or Microsoft account, the recipient can sign in to the OME portal using the social ID.
2) To manage whether or not to allow recipients to use social IDs to sign in to the OME portal
- Run the Set-OMEConfiguration cmdlet with the SocialIdSignIn parameter as follows:
- Set-OMEConfiguration -Identity "OME Configuration" -SocialIdSignIn $false
- To enable social IDs:
- Set-OMEConfiguration -Identity "OME Configuration" -SocialIdSignIn $true
3) Managing the use of one-time passcodes for signing in to the Office 365 Message Encryption portal
By default, if the recipient of a message encrypted by OME doesn't use Outlook, regardless of the account used by the recipient, the recipient receives a limited-time web-view link that lets them read the message. This includes a one-time passcode. As an administrator, you can manage whether or not one-time passcodes can be used to sign-in to the OME portal.
To manage whether or not one-time passcodes are generated for Office Message Encryption
- Run the Set-OMEConfiguration cmdlet with the OTPEnabled parameter as follows:
- For example, to disable one-time passcodes:
- Set-OMEConfiguration -Identity "OME Configuration" -OTPEnabled $false
- To enable one-time passcodes:
- Set-OMEConfiguration -Identity "OME Configuration" -OTPEnabled $true
- For example, to disable one-time passcodes:
4) Managing the display of the Protect button in Outlook on the web
By default, the Encrypt button in Outlook on the web is not enabled when you set up OME. As an administrator, you can manage whether or not to display this button to end-users. To manage whether or not the Protect button appears in Outlook on the web:
- Run the Set-IRMConfiguration cmdlet with the -SimplifiedClientAccessEnabled parameter as follows:
- For example, to disable the Encrypt button:
- Set-IRMConfiguration -SimplifiedClientAccessEnabled $false
- To enable the Encrypt button:
- Set-IRMConfiguration -SimplifiedClientAccessEnabled $true
5) Enable service-side decryption of email messages for iOS mail app users
The iOS mail app can't decrypt messages protected with Office 365 Message Encryption. As an Office 365 administrator, you can apply service-side decryption for messages delivered to unenlightened clients like the iOS mail app. When you choose to do this, the service will send a decrypted copy of the message to the iOS device. The message is stored decrypted on the client device. The message also retains information about usage rights even though the iOS mail app doesn't apply client-side usage rights to the user. This means that the user can copy or print the message even if they did not originally have the rights to do so.
However, if the user attempts to complete an action that requires the Office 365 mail server, such as forwarding the message, the server will not permit the action if the user did not originally have the usage right to do so. Still, end-users can work around Do Not Forward usage restriction by forwarding the message from a different account in their iOS mail app.
Regardless of whether you set up service-side decryption of mail, any attachments to encrypted and rights protected mail cannot be viewed in the iOS mail app. If you choose not to allow decrypted messages to be sent to iOS mail app users, users receive a message that states that they don't have the rights to view the message. By default, service-side decryption of email messages is not enabled.
Office Message Encryption: The Wrap-Up
You did it! Congratulations. As you can see, setting up OME is no small undertaking but hopefully, these steps got you through to the other side. If you have any questions or thoughts, please feel free to reach out her

We implement OME with all of our cybersecurity plans.
Next up: Step Four
STEP FOUR: Enable Office 365 ATP (Advanced Threat Protection)
In Step Four, we're going to walk you through the step-by-step process for setting up Office 365 Advanced Threat Protection (ATP).

There are three parts to setting up Office 365 Advanced Threat Protection:
To enable Office 365 ATP you will need one of the follow licenses:
- Office 365 ATP Plan 1
- Office 365 ATP Plan 2
- Microsoft 365 Business Premium (formerly known as Microsoft 365 Business)
- Office 365 E5
- Microsoft 365 E5
OK, let's get started!
- Go to https://protection.office.com/homepage using an 'incognito' (private) session on a Chrome browser
- Sign In using your global admin credentials
- Click on Threat Management
- Click on Policy
Part 1 - Office 365 ATP Safe Attachments
Once the appropriate licenses are assigned to all of your users, follow these steps to implement the 'Safe Links' feature:
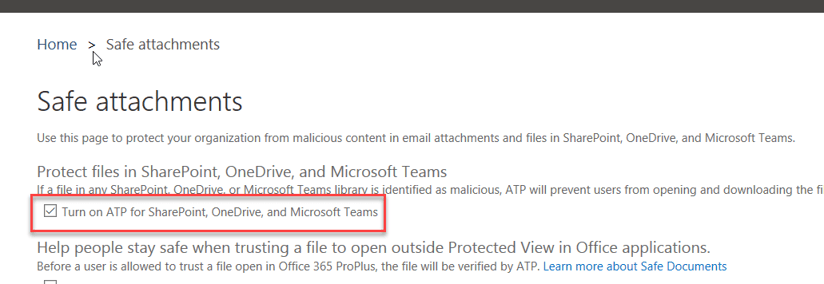
- Click on ATP safe attachments
- Enable the check box for Turn on ATP for SharePoint, OneDrive, and Microsoft Teams
- Click on +
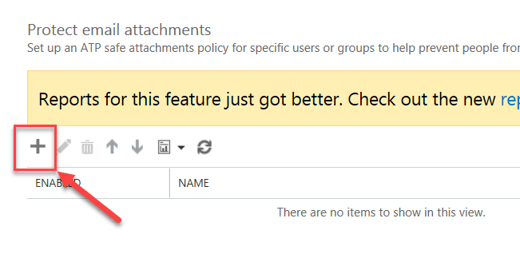
- Give a name to your policy
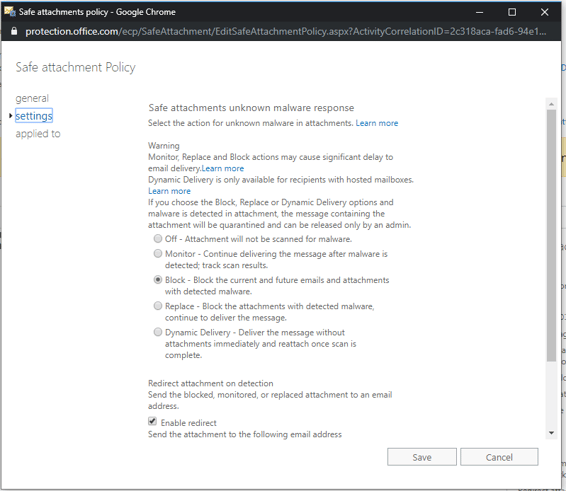
- Select the Replace option
- Turn on Enable redirect and enter the alias of the IT Manager or IT team = service@bemopro.com so we receive a ticket
Option 1 - More restrictive policy
Option 2 - Less restrictive policy
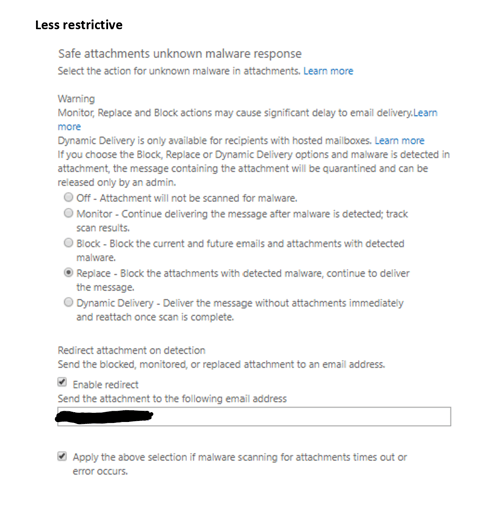
Check the box for Apply the above selection if malware scanning for attachments times out or error occurs
Apply the rule "If the recipient domain is"
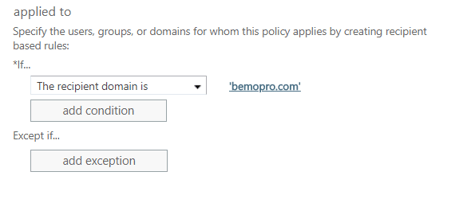
Click the Save button
Note: It can take from 5 sec to 5 min to apply settings to tenant
Part 2 - Office 365 ATP Safe Links
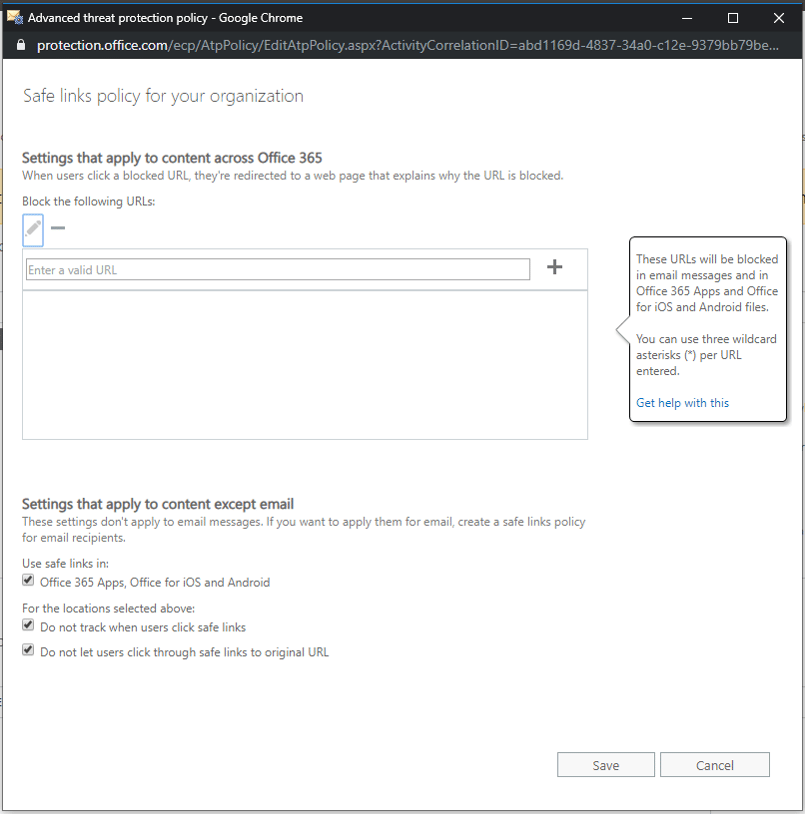
Click on ATP Safe Links, then Double-click on Default
A popup window will open
- Check the box for Office 365 Apps, Office for iOS and Android
- Check the box for Do not track when users click safe links
- Check the box for Do not let users click through safe links to original URL
- Click Save
ATP Safe Links has been set up!
Part 3 - ATP Anti-phishing
- Click on Anti-phishing
- Click on Default policy
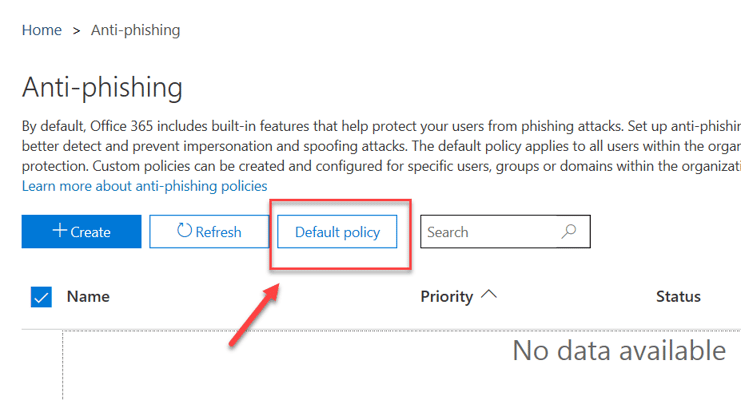
The following window will show up:
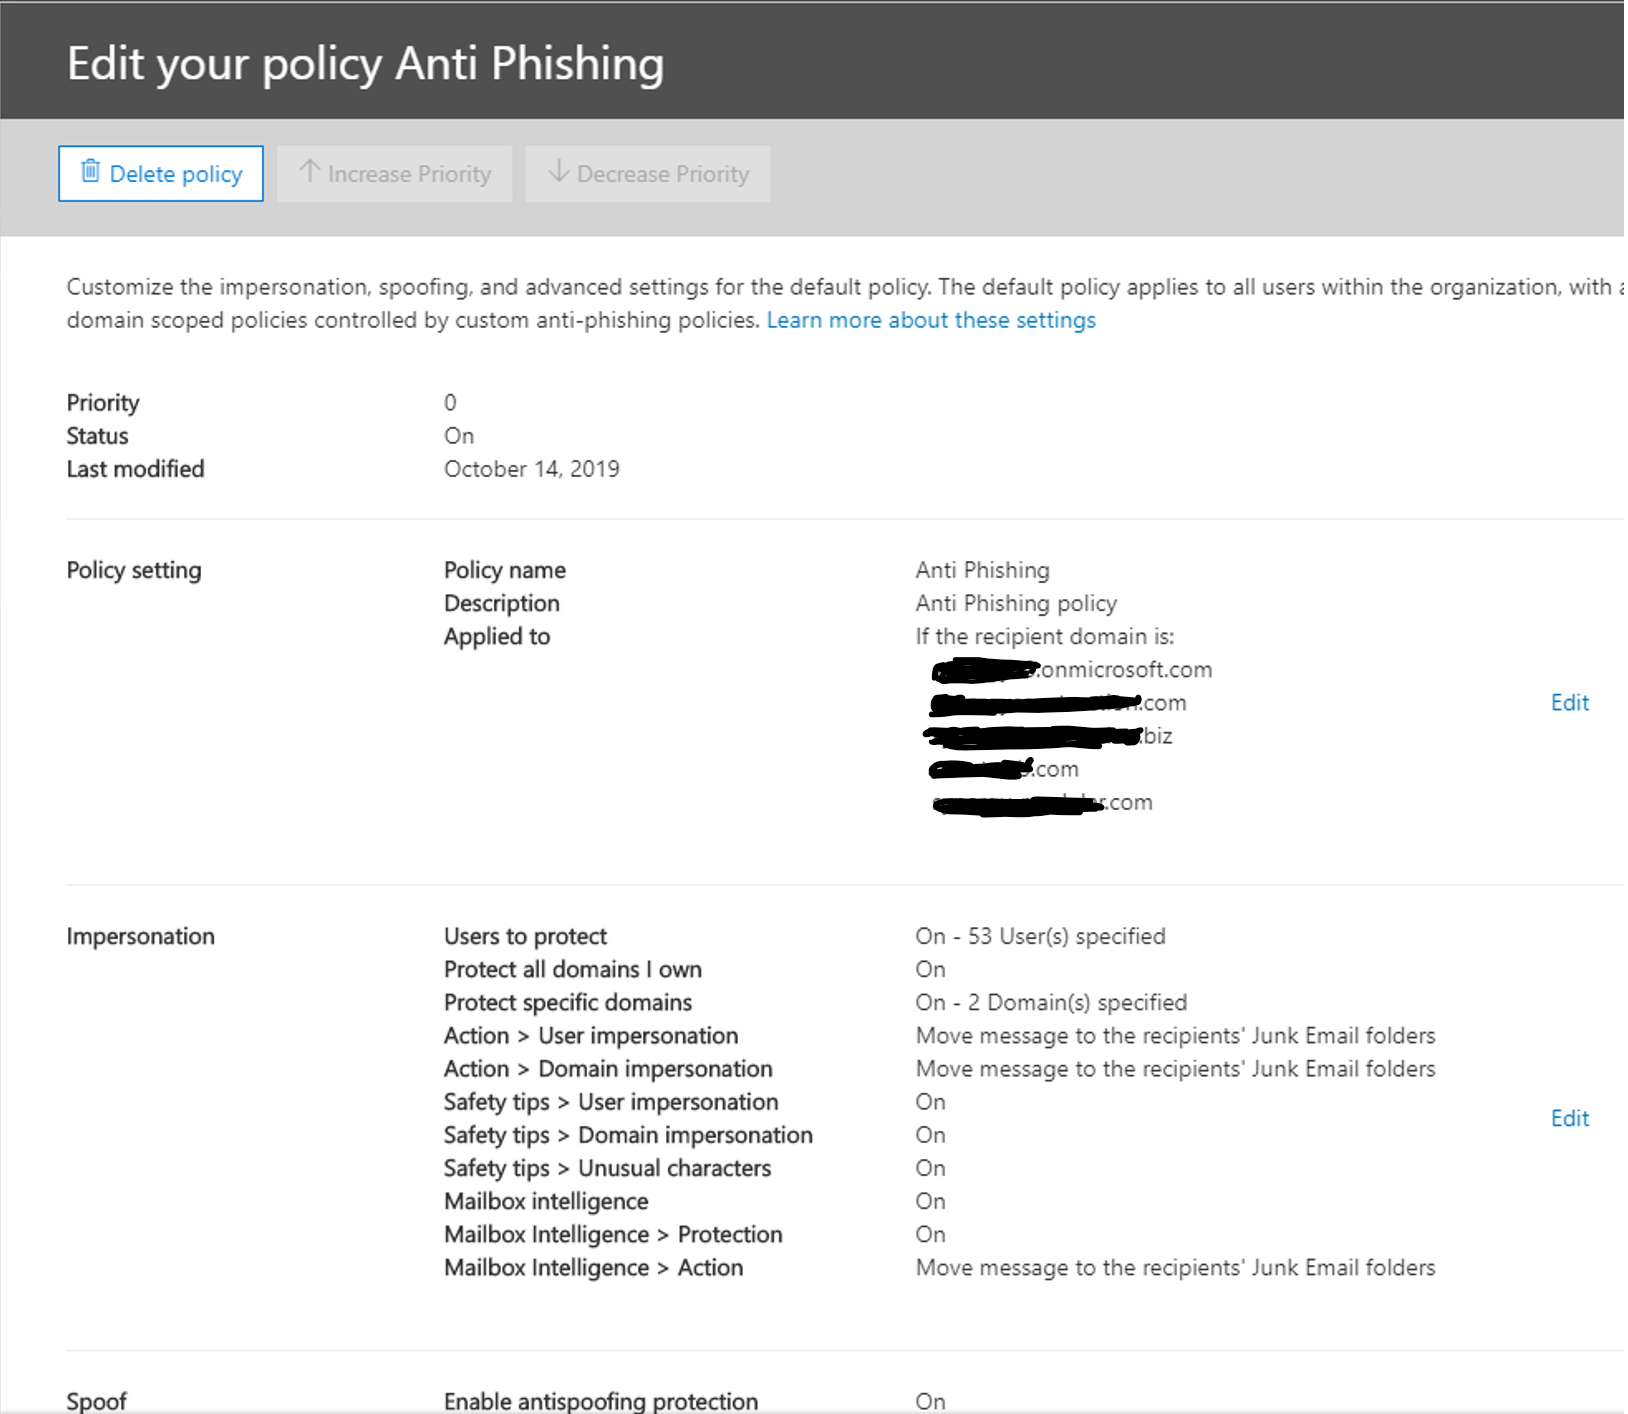
Within the Impersonation section, click Edit
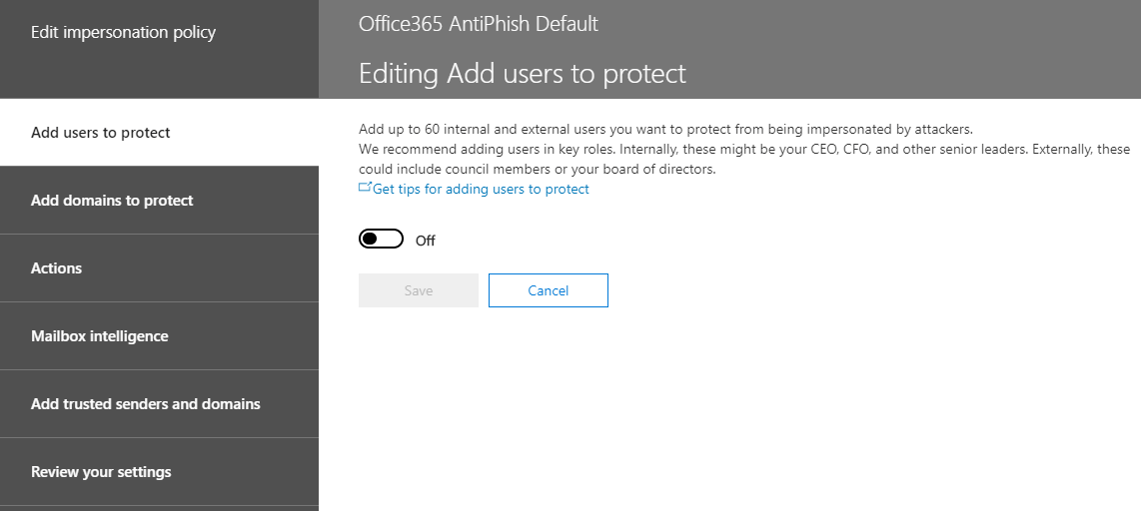
- Switch the button from Off to On
- Click Add user
- Add the Email address of the user and click Save (note: you cannot add more than one user at a time).
- Repeat steps 5 and 6 until you have added all users
- Click on Add domains to protect
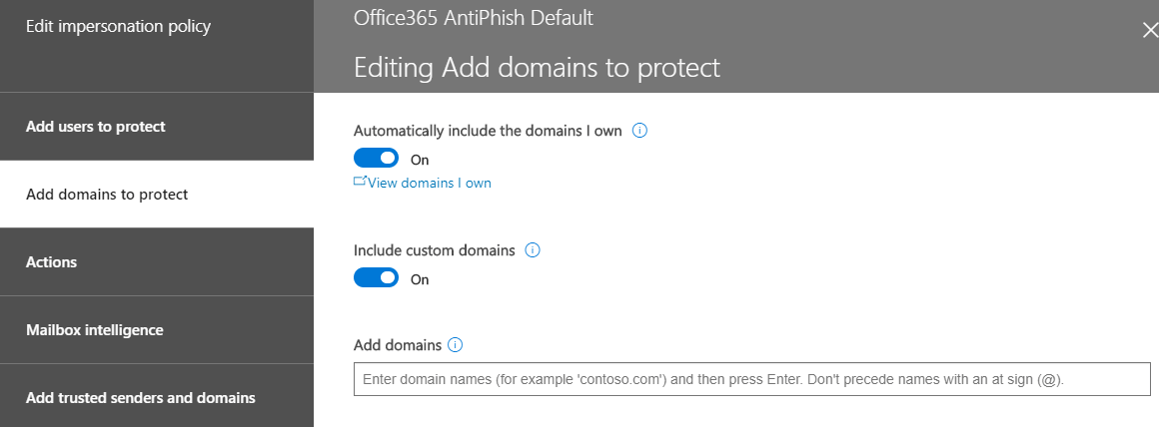
- Turn on Automatically include the domains I own and Include custom domains
- Click on Actions
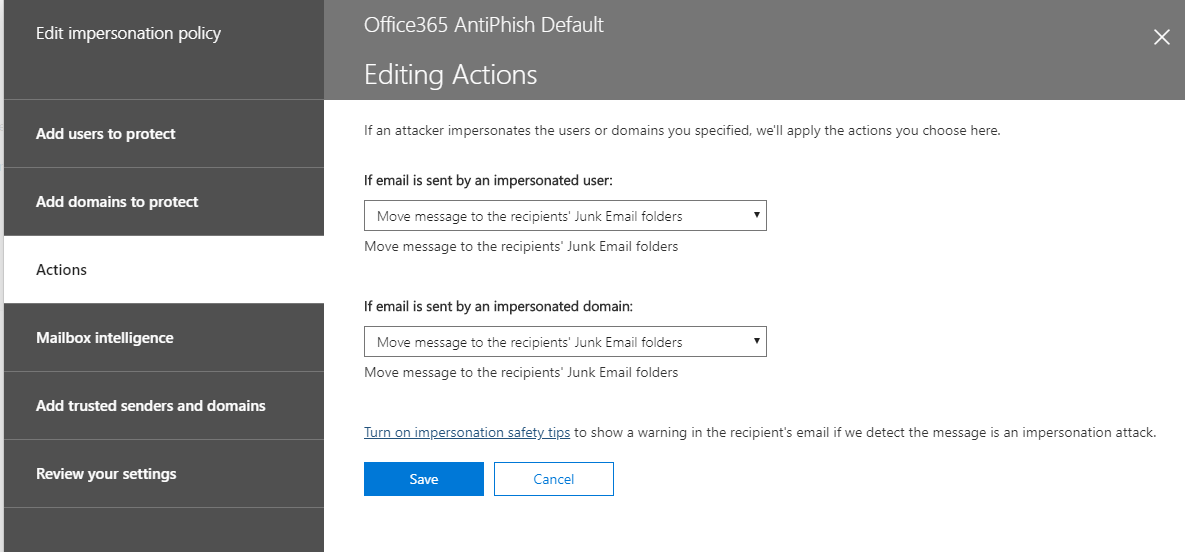
- Under if email is sent by an impersonated user, select Move message to the recipients' Junk Email folders
- Under if email is sent by an impersonated domain, select Move message to the recipients' Junk Email folders
- Click on the link Turn on impersonation safety tips

- Turn on all 3 switches (Show tip for impersonated users, Show tip for impersonated domains, and Show tip for unusual characters)
- Click Save
- Click on Mailbox Intelligence
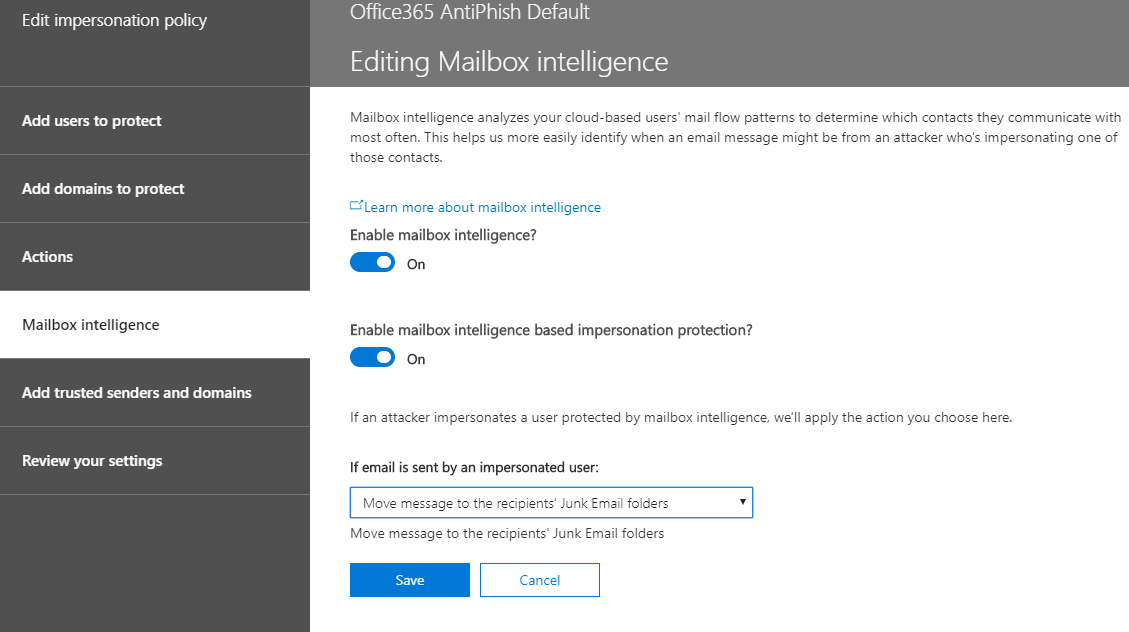
- Turn on Enable mailbox intelligence
- Turn on Enable mailbox intelligence based impersonation protection
- Under if email is sent by an impersonated user, select Move message to the recipients' Junk Email folder
- Select Add trusted senders and domains. You should have nothing to do there
- Click on Review your settings
- Once you have reviewed the settings and everything looks good to you, click Save
- Click Close
Congratulations! You've now completed all three steps to set up Office 365 Advanced Threat Protection (ATP).
Need help or prefer we do it for you? Click on the button below for help:
Last but certainly not least: Step Five: MFA
STEP FIVE: Enable Office 365 MFA with Authenticator App
With 81 percent of data breaches being due to weak, reused, or stolen passwords, turning on Multi-Factor Authentication (MFA) for all of your apps is necessary. In Step Five, we'll show you how to setup MFA for your Office 365 account paired with the Microsoft Authenticator smartphone app.
Microsoft Authenticator App
What is MFA? Follow the link to read a quick blog about what MFA is and why you need it.
While you can authenticate by typing in a 6-digit verification code sent your phone or email address, having to jump back and forth between tabs and apps and then typing out the code is really annoying. The Microsoft Authenticator app alleviates this poor end user experience.
Benefits of the Microsoft Authenticator App
- Secure
- Available for iOS and Android devices
- Can approve an MFA request even if you have no cell coverage
- Can approve an MFA request even if you have no wireless coverage
- If you have a limited SMS Plan and have wifi, you will not be using your SMS plan to get authenticated
- The best of all, Microsoft delivers the best MFA experience. You just need to click a button to MFA, no need to read, remember, and type a 6-digit code
Office 365 MFA Step-by-Step Setup
Before we begin, you or your IT administrator must have enabled MFA and the Azure feature called “Users can use preview features for registering and managing security info – enhanced” before being able to follow the steps below.
Let’s get started!
- Go to https://office.com
- Click on Sign in
- Type your username and click Next
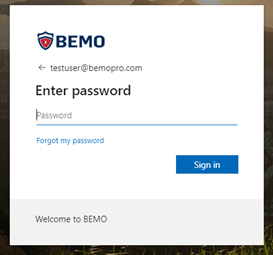
- Type your password and click on Sign in
- You will now be required to provide more information and start enrolling your device against your Office 365 account.
- Click Next in the screen below
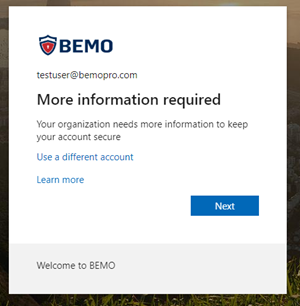
- Click Next in the screen below
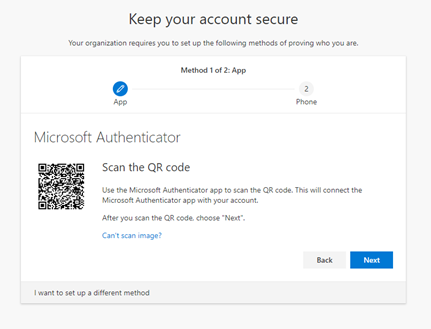
- You will now be presented with a wizard to install the Microsoft Authenticator app on your phone
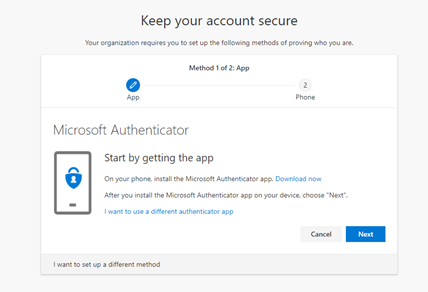
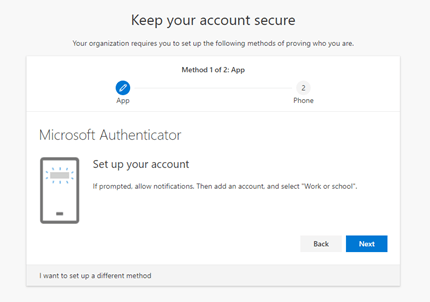
Once you have downloaded the app, please make sure you allow the Microsoft Authenticator app to use your camera (if asked). If the app cannot use the camera, you will not be able to complete the setup correctly. Once the app is installed, you will need to set up your account to connect to the app.
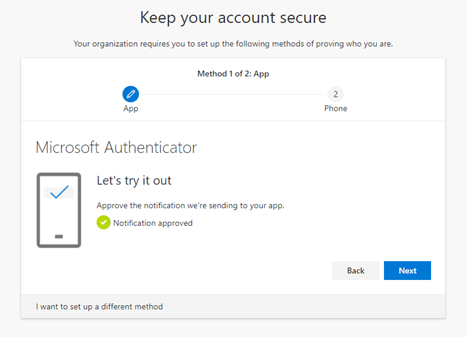
Now that the app has been registered against your account, let’s validate that it has been set up correctly
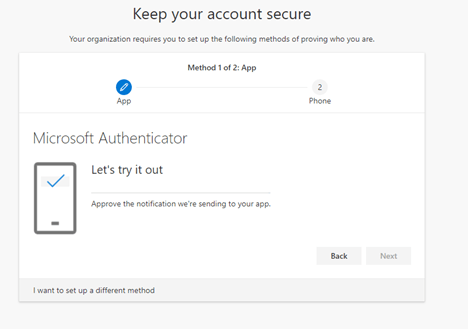
You will receive a ‘pop up’ notification from Microsoft Authenticator. You will need to press the Approve button to move forward. The nice thing is that, compared to SMS, MFA does not require you to type any number, making the process faster and easier.
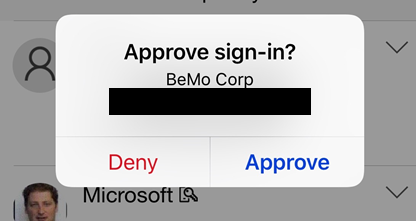
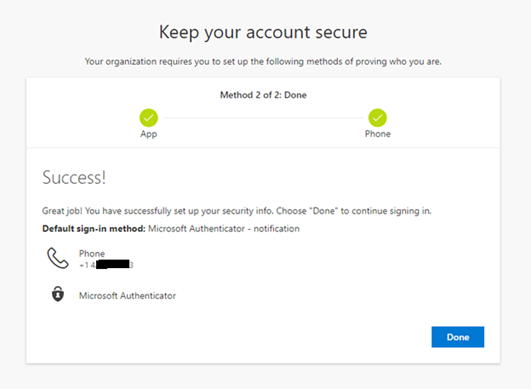
If the setup is successful, you will receive the following confirmation: “Notification approved”
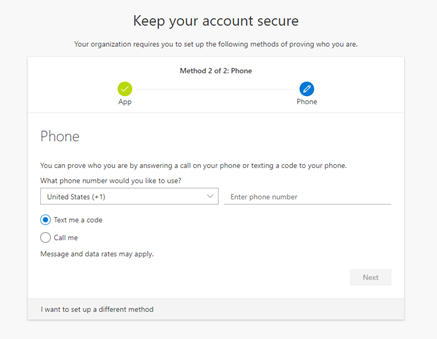
Now, you will set up a backup option: the normal MFA via SMS. You will be asked to enter your mobile phone number and decide if you want to have your validation done via an SMS or by having Microsoft call you.
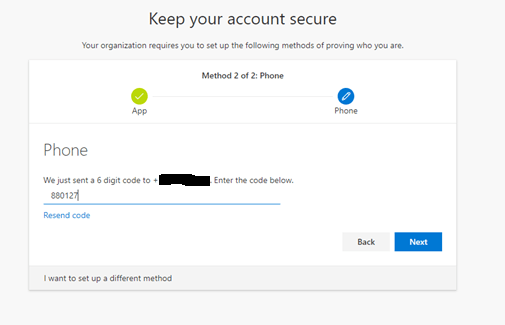
In the example below, I have chosen the SMS option. Once you receive the SMS, enter the 6 digit code and click Next
When successful, you will receive the following screen “SMS verified successfully”
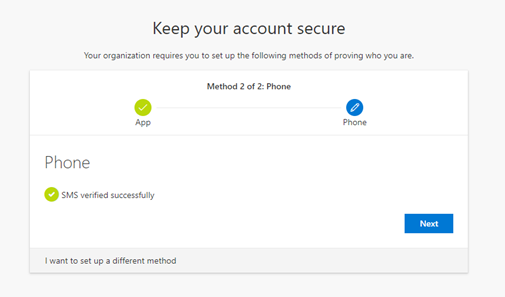
You are now ready to use Microsoft Authenticator as the default sign-in method
And...that's a wrap! Whew! If you've made it this far, you deserve a serious pat on the back. Congratulations in making it through all five steps in our complete Microsoft email security series!

Questions? Comments? In need of praise for a job well done? Drop us a line in the comments section below to let us know how it went! 👇
As always, BEMO is happy to help. Click on the button below to reach out to our team today.
We've got more resources for you to become a cyber-pro.

Leave us a comment!