
Difficulty Level: Intermediate | Time Investment: 1-1.5 hours
Summary: Many organizations face the growing need to protect their users and data from sophisticated cyber threats, but navigating the complexities of Office 365 Advanced Threat Protection (ATP) can be daunting. This guide walks you through the essential steps to set up ATP, ensuring your business is shielded against malicious attacks like phishing, malware, and dangerous links.
*Setting up ATP is important for email security, but it's just one part of a complete strategy to keep emails safe.
Table of Contents
Part 1 - Office 365 ATP Safe Attachments
OK, let's get started!
- Go to https://protection.office.com/homepage using an 'incognito' (private) session on a Chrome browser
- Sign In using your global admin credentials
- Click on Threat Management
- Click on Policy
Once the appropriate licenses are assigned to all of your users, follow these steps to implement the 'Safe Links' feature:
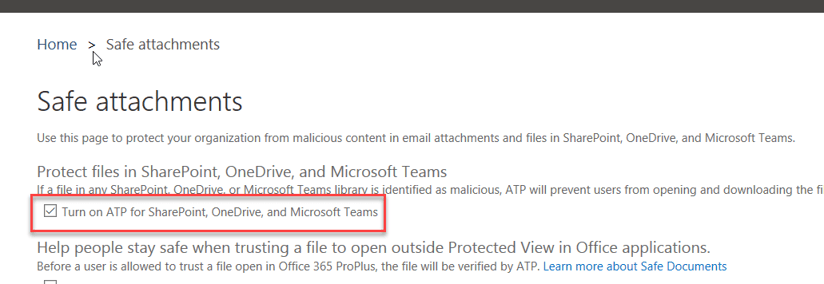
- Click on ATP safe attachments
- Enable the check box for Turn on ATP for SharePoint, OneDrive, and Microsoft Teams
- Click on +
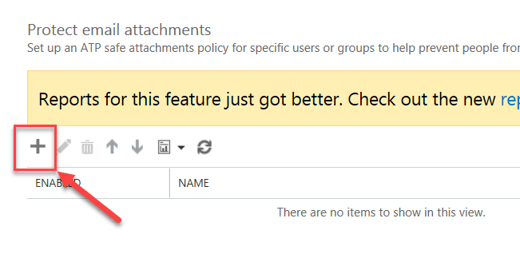
- Give a name to your policy
- Select the Replace option
- Turn on Enable redirect and enter the alias of the IT Manager or IT team = service@bemopro.com so we receive a ticket
Option 1 - More restrictive policy
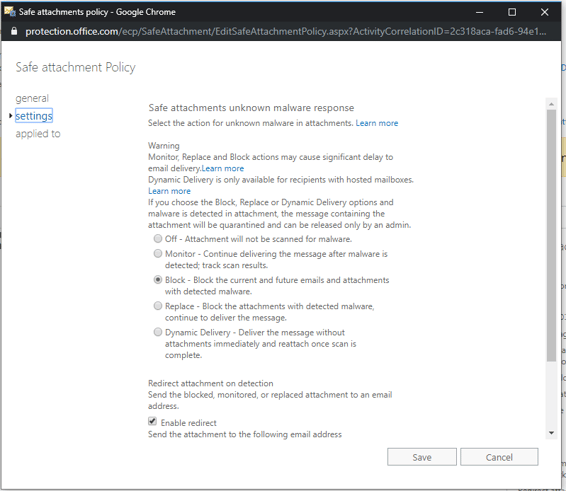
Option 2 - Less restrictive policy
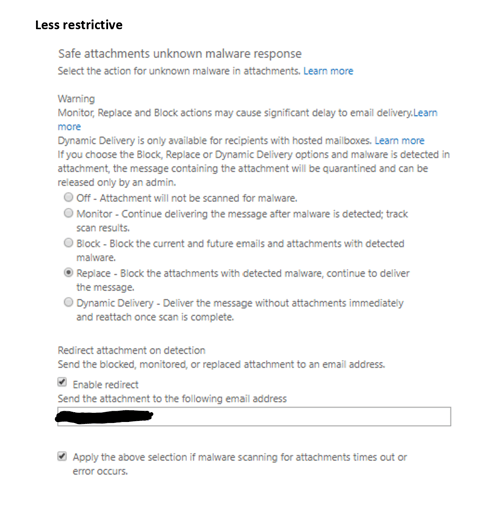
Check the box for Apply the above selection if malware scanning for attachments times out or error occurs
Apply the rule "If the recipient domain is"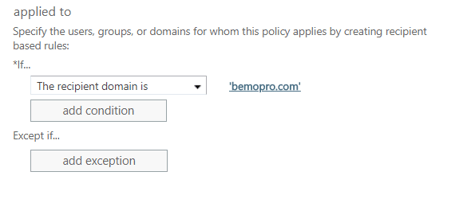
Note: It can take from 5 sec to 5 min to apply settings to tenant
Part 2 - Office 365 ATP Safe Links
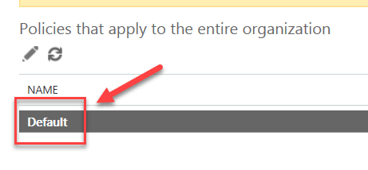
Click on ATP Safe Links, then Double-click on Default
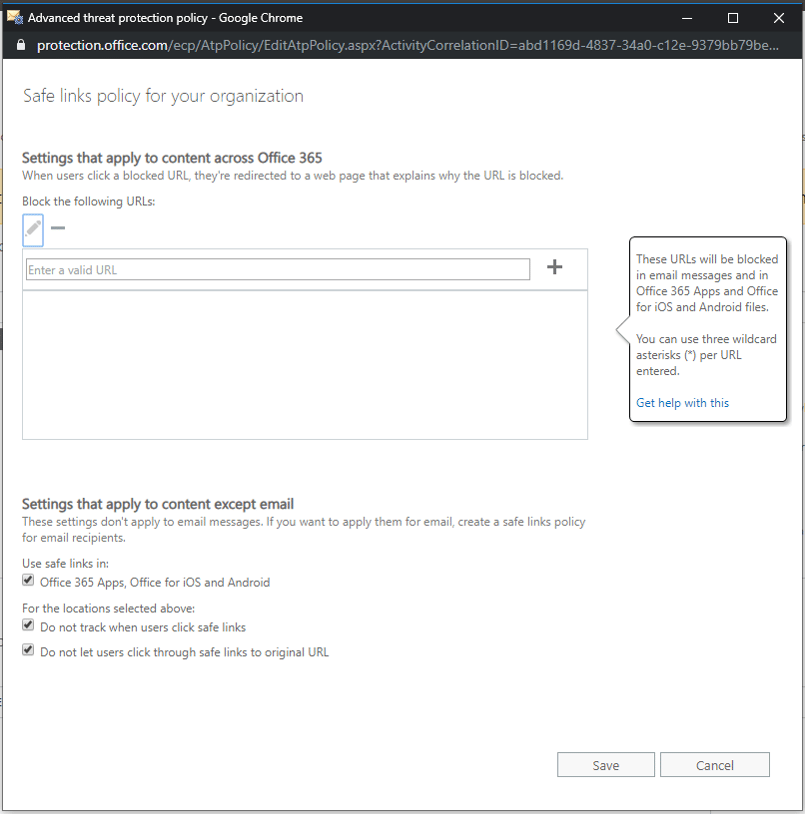
A popup window will open
- Check the box for Office 365 Apps, Office for iOS and Android
- Check the box for Do not track when users click safe links
- Check the box for Do not let users click through safe links to original URL
- Click Save
ATP Safe Links has been set up!
Part 3 - ATP Anti-phishing
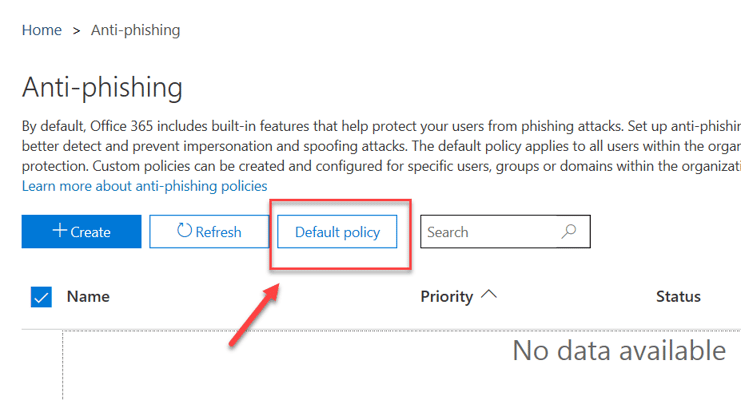
- Click on Anti-phishing
- Click on Default policy
The following window will show up:
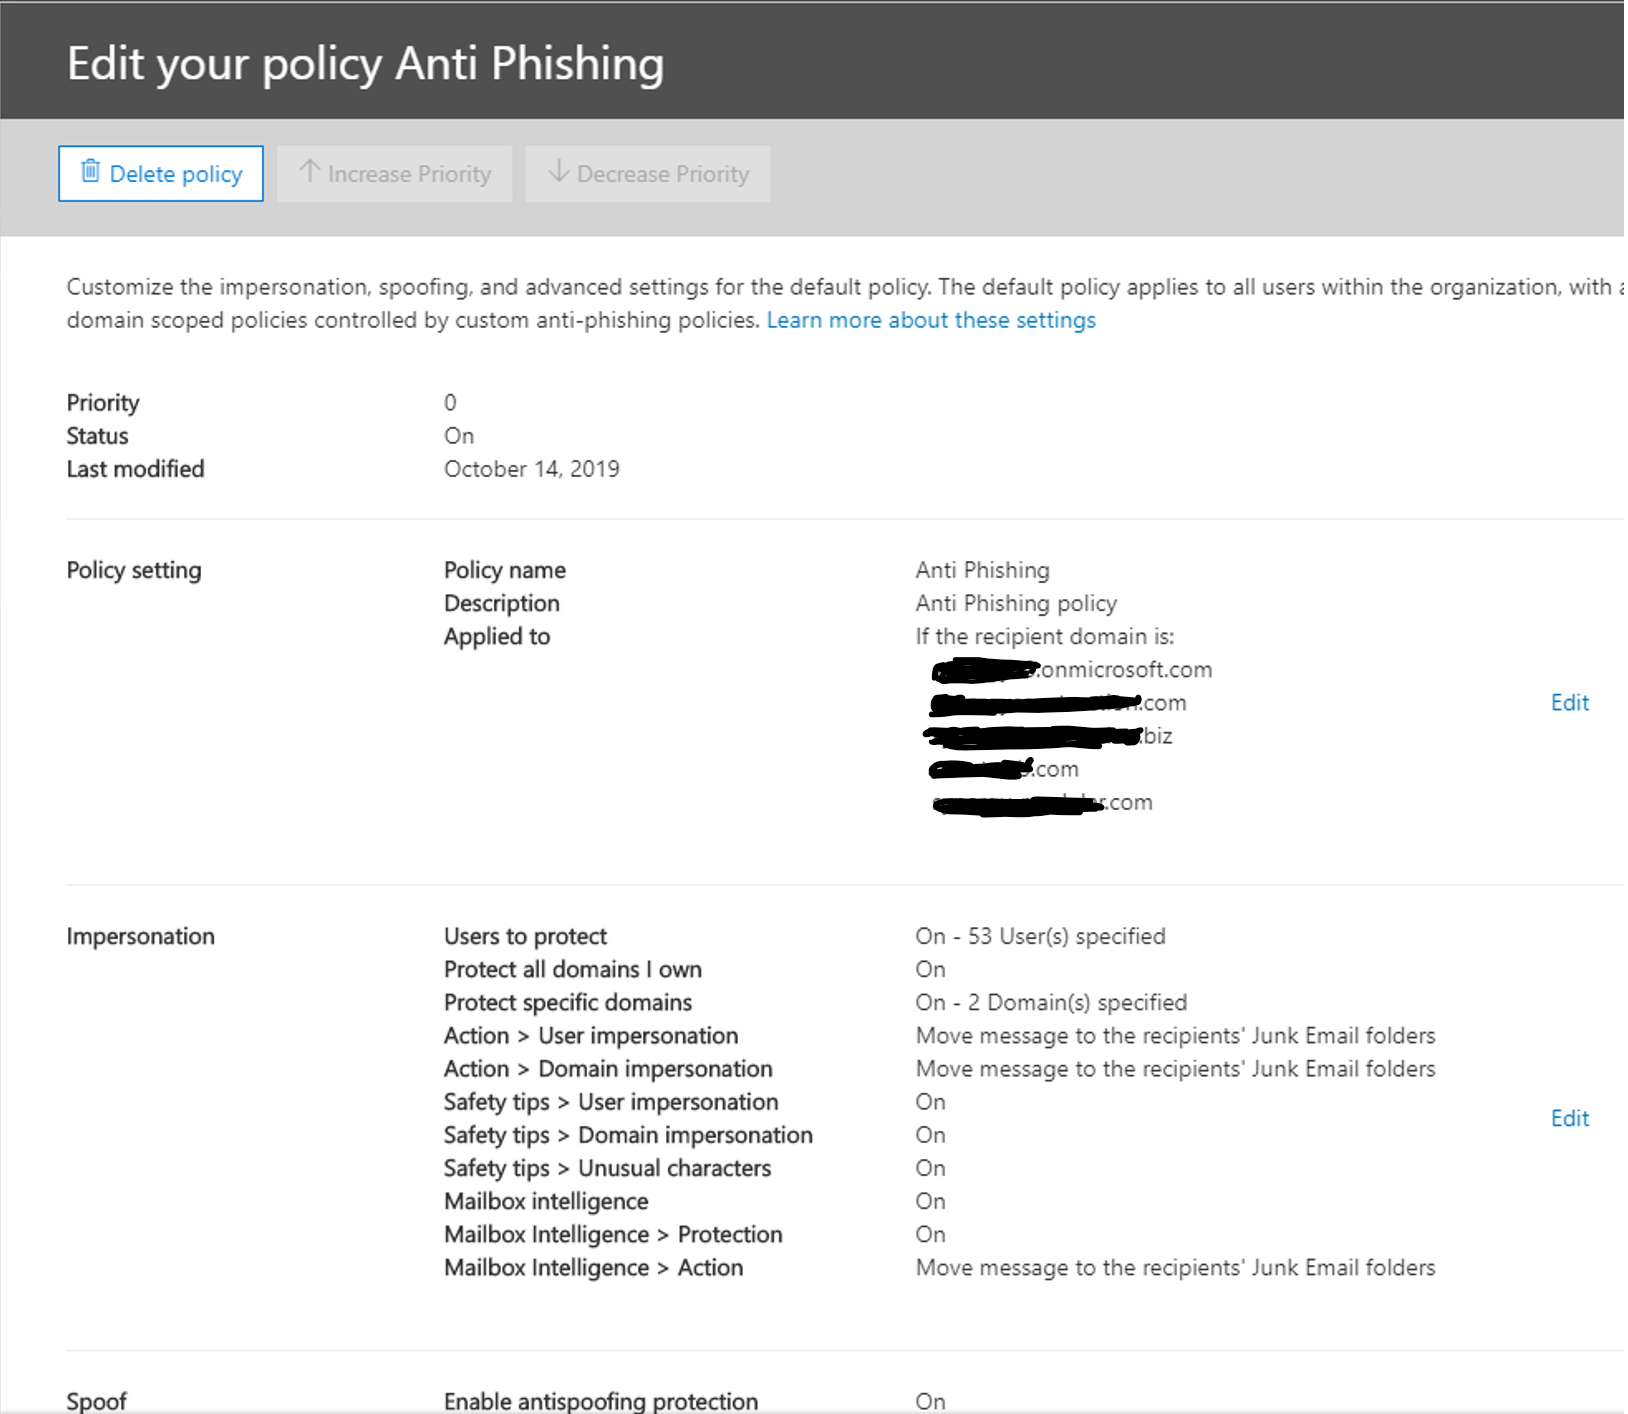
Within the Impersonation section, click Edit
- Switch the button from Off to On
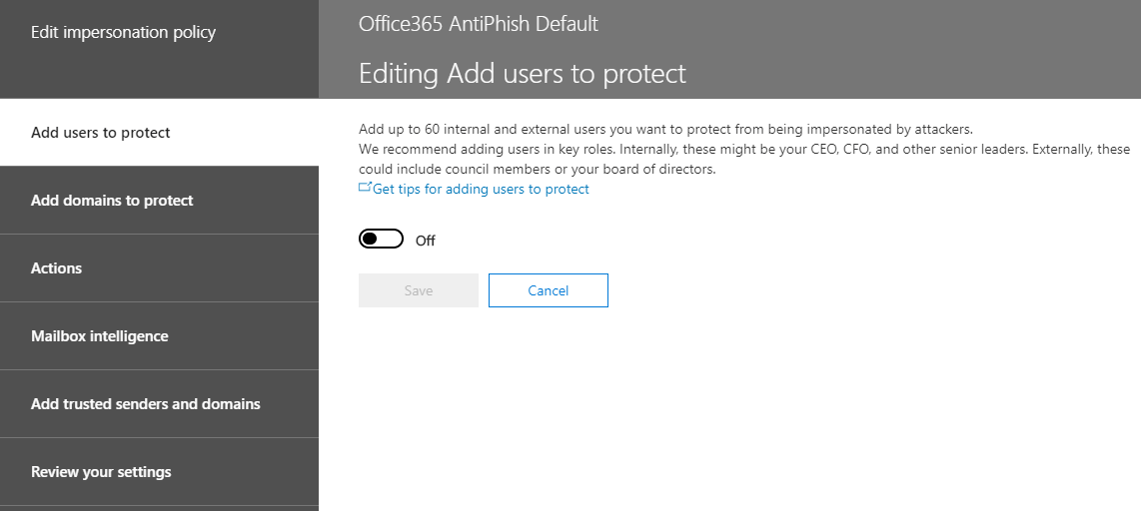
- Click Add user
- Add the Email address of the user and click Save (note: you cannot add more than one user at a time).
- Repeat steps 5 and 6 until you have added all users
- Click on Add domains to protect
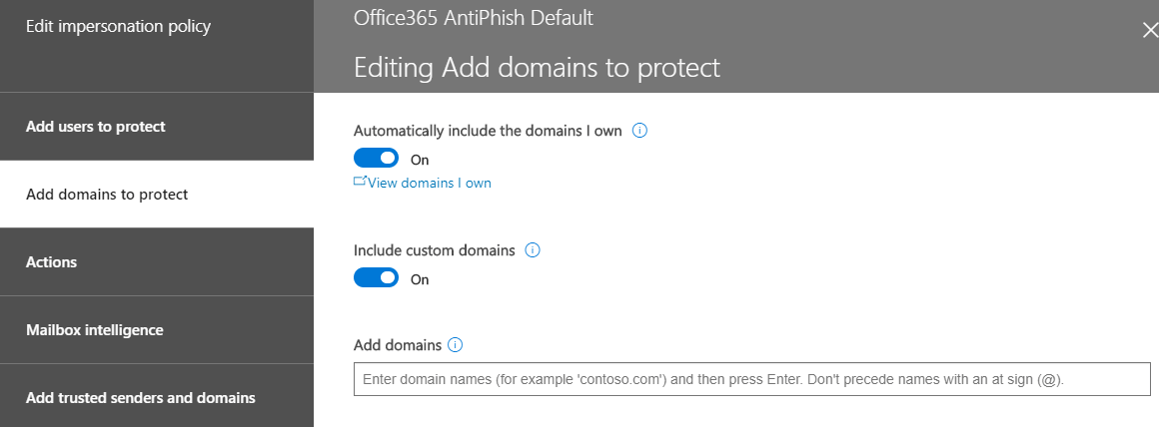
- Turn on Automatically include the domains I own and Include custom domains
- Click on Actions
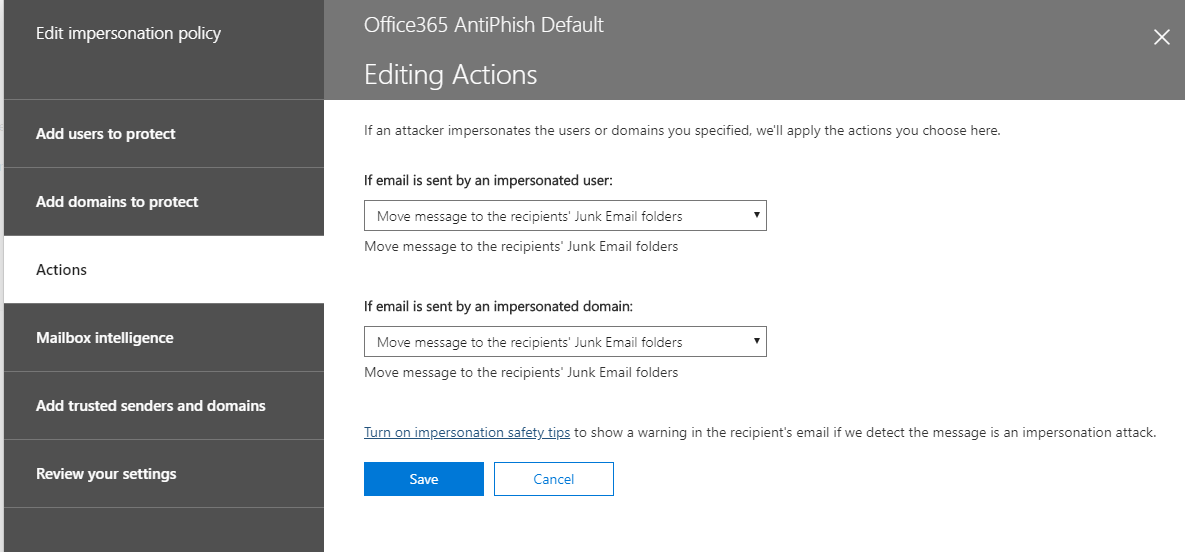
- Under if email is sent by an impersonated user, select Move message to the recipients' Junk Email folders
- Under if email is sent by an impersonated domain, select Move message to the recipients' Junk Email folders
- Click on the link Turn on impersonation safety tips

- Turn on all 3 switches (Show tip for impersonated users, Show tip for impersonated domains, and Show tip for unusual characters)
- Click Save
- Click on Mailbox Intelligence
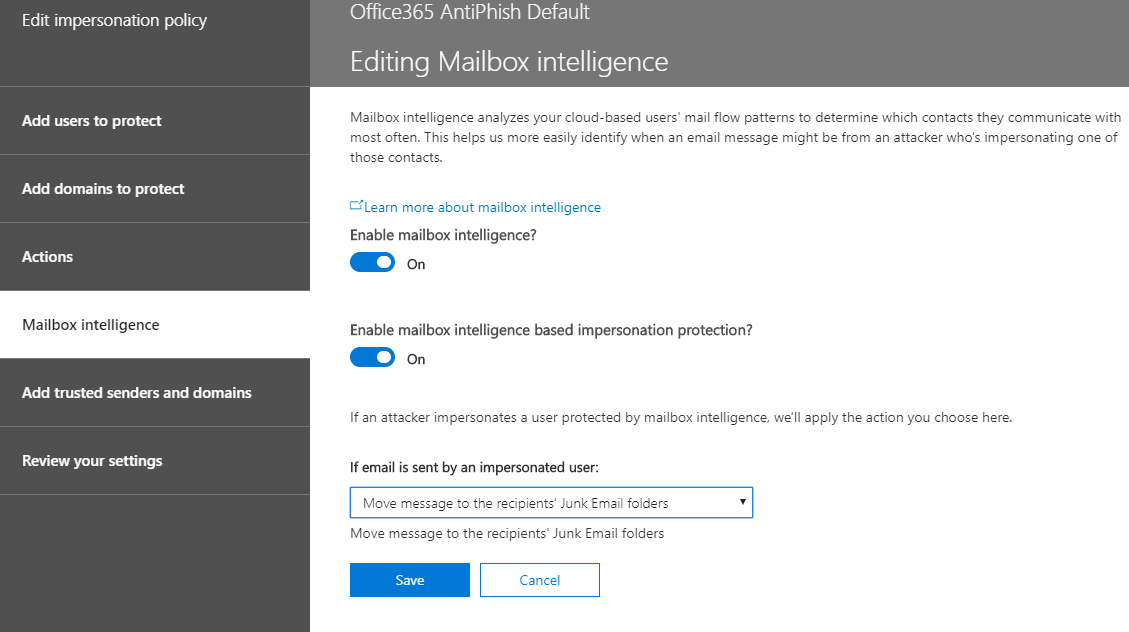
- Turn on Enable mailbox intelligence
- Turn on Enable mailbox intelligence based impersonation protection
- Under if email is sent by an impersonated user, select Move message to the recipients' Junk Email folder
- Select Add trusted senders and domains. You should have nothing to do there
- Click on Review your settings
- Once you have reviewed the settings and everything looks good to you, click Save
- Click Close
Congratulations! The settings for Anti-Phishing are now all set up!
Not looking to do this yourself?
Schedule a meeting with us to learn more about implementing Office 365 ATP and all the other email security tools offered by Microsoft.
We've got more resources for you to become a cyber-pro.

Leave us a comment!