
Difficulty Level: Intermediate to Advanced | Time Investment: 1.5 hours
Summary: Azure AD Connect is a Microsoft tool designed to meet and accomplish your hybrid identity goals. It lets you connect your on-premises Active Directory to Azure Active Directory, providing the following features:
- Password hash synchronization- A sign-in method that synchronizes a hash of a user's on-premises AD password with Azure AD.
- Pass-through authentication- A sign-in method that allows users to use the same password on-premises and in the cloud, but doesn't require the additional infrastructure of a federated environment.
- Federation integration- Federation is an optional part of Azure AD Connect and can be used to configure a hybrid environment using an on-premises AD FS infrastructure. It also provides AD FS management capabilities such as certificate renewal and additional AD FS server deployments.
- Synchronization- Responsible for creating users, groups, and other objects. As well as, making sure identity information for your on-premises users and groups is matching the cloud. This synchronization also includes password hashes.
- Health Monitoring- Azure AD Connect Health can provide robust monitoring and provide a central location in the Azure portal to view this activity.
Before You Start
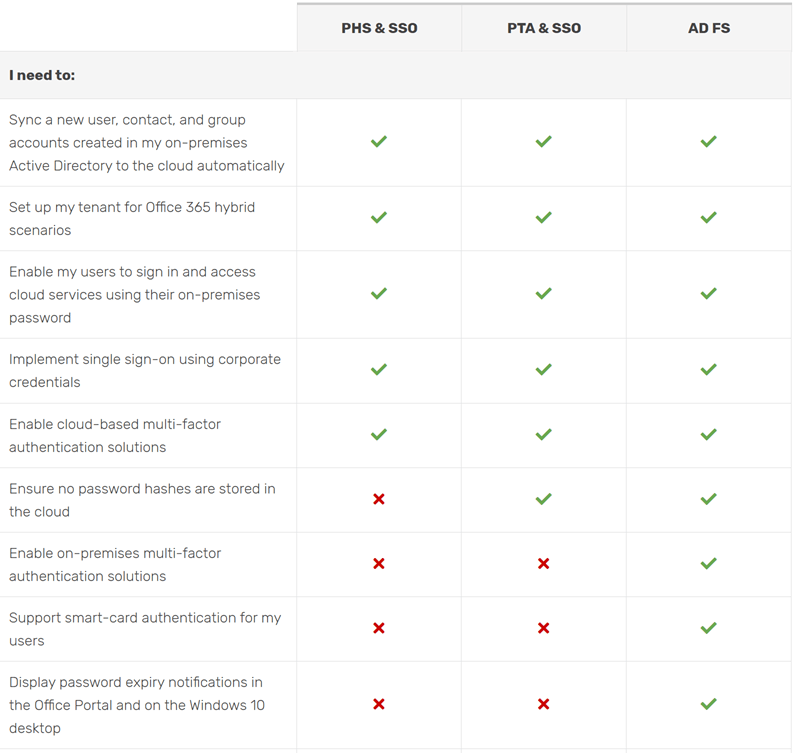
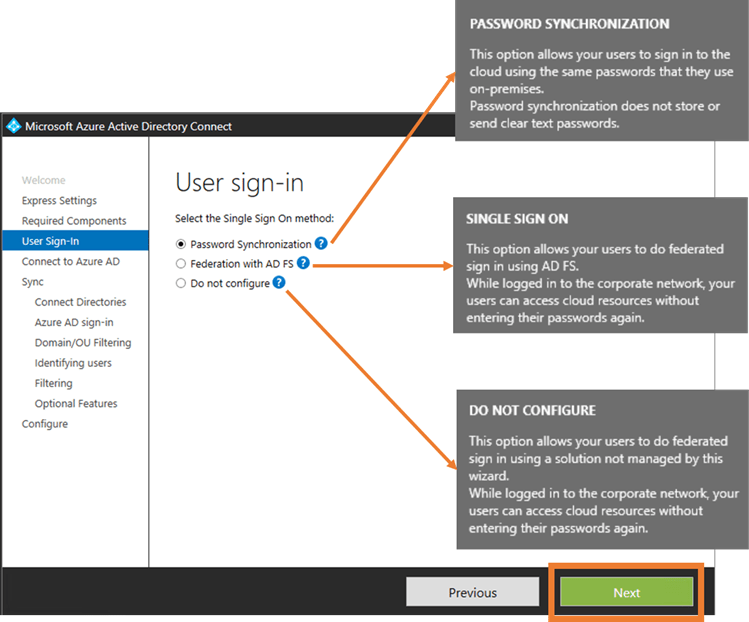
When setting up Azure AD Connect you will be given to choice (step 5 of instructions) between several authentication methods between your Active Directory and Azure Active Directory. Below is a table of common hybrid identity and access management scenarios with recommendations as to which hybrid identity option (or options) may be appropriate for your organization:
- Column 1: Password Hash Synchronization with Single Sign-On
- Column 2: Pass-through Authentication and Single Sign-On
- Column 3: Single Sign-On with Active Directory Federated Services
Step-By-Step Instructions
1. Microsoft recommends installing Azure AD Connect on a separate server. However, if your server is capable of carrying the load, it is possible to install it on the main Domain Controller. Remote into the server and download the newest version of the Azure AD Connect.
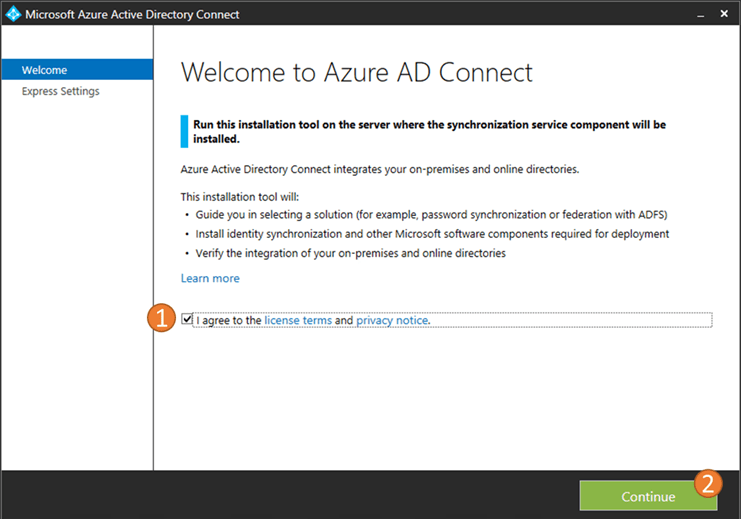
2. After downloading the Azure AD Connect tool, open the file and agree to the license terms and privacy notice by checking the checkbox. Click ‘Continue’.
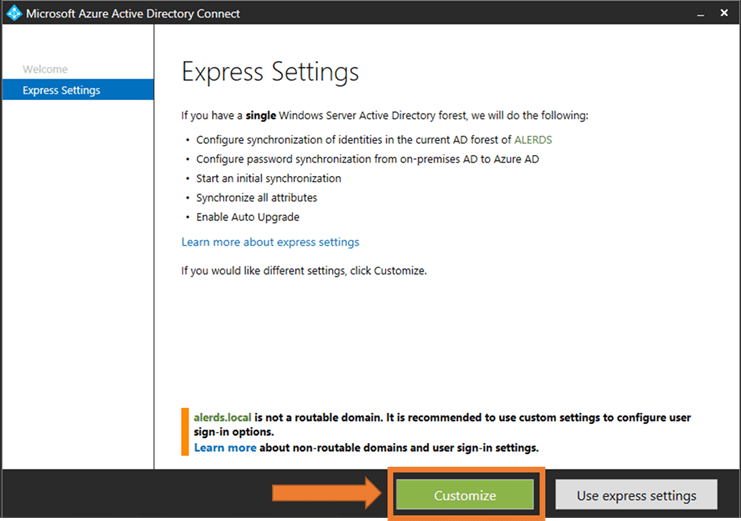
3. From the 'Express Settings' tab, select the Customize button.
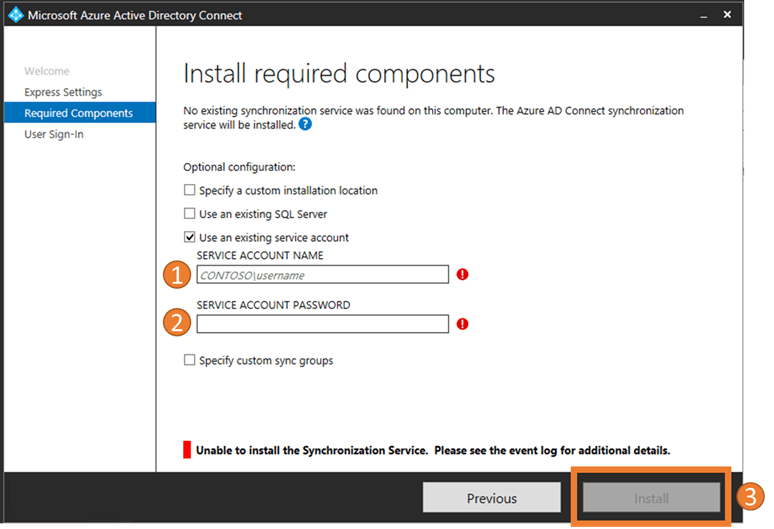
4. From the 'Install Required Components' tab, check the 'Use an existing service account' and set the required information. You will need to type your domain administration credentials. Click ‘Install’.
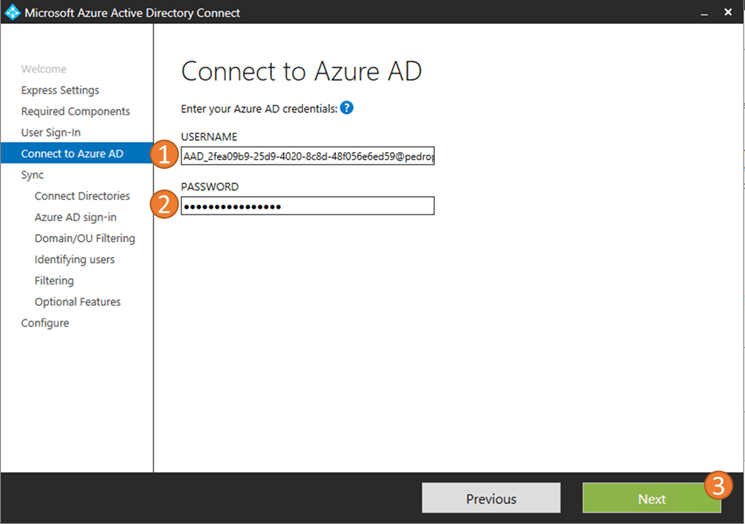
6. From the 'Connect to Azure AD' tab, you will need to type you Active Directory credentials, this may also be known as Office 365 administrator credentials.
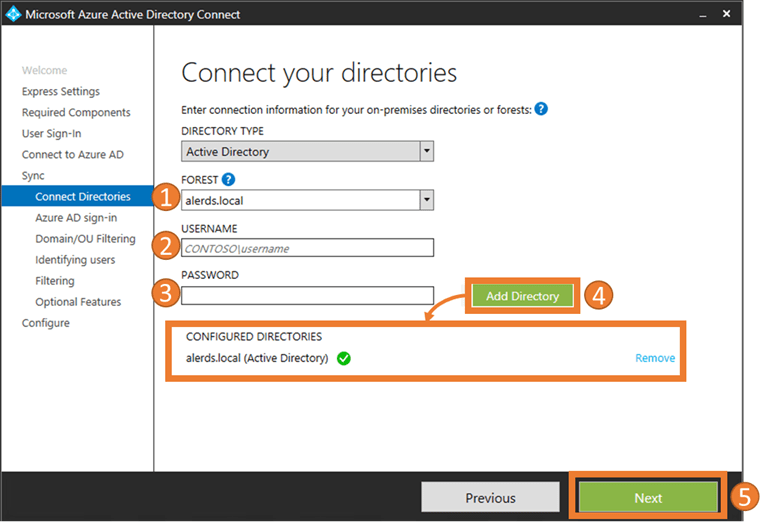
7. From the 'Connect Directories' tab, you will need to enter your current deployment directory information.
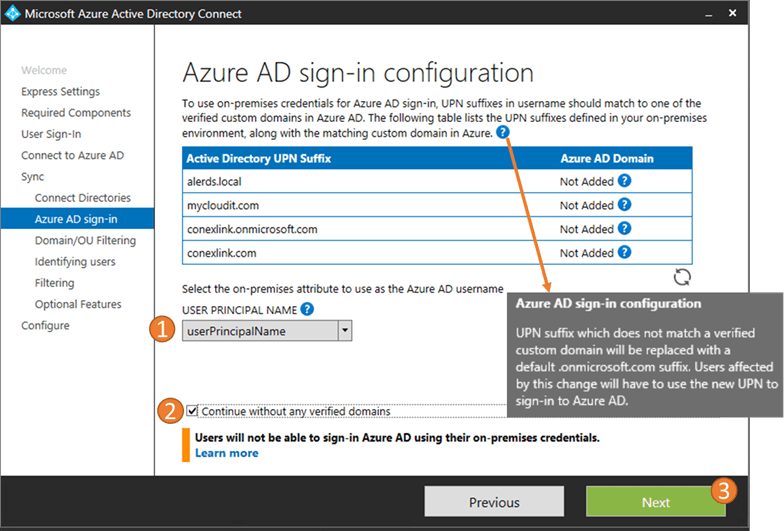
8. On the 'Azure AD sign-in configuration' tab, our recommendation is to set the on-premise attribute (in this case your on-premise will be your deployment) to be used in the Azure AD to userPrincipalName. If your domain is still not verified, you can check the ‘Continue’ without any verified domains checkbox to continue.
9. On the Domain and OU filtering, leave everything as default to sync the entire directory data. You can also filter this data by only selecting the desire domain and OUs.
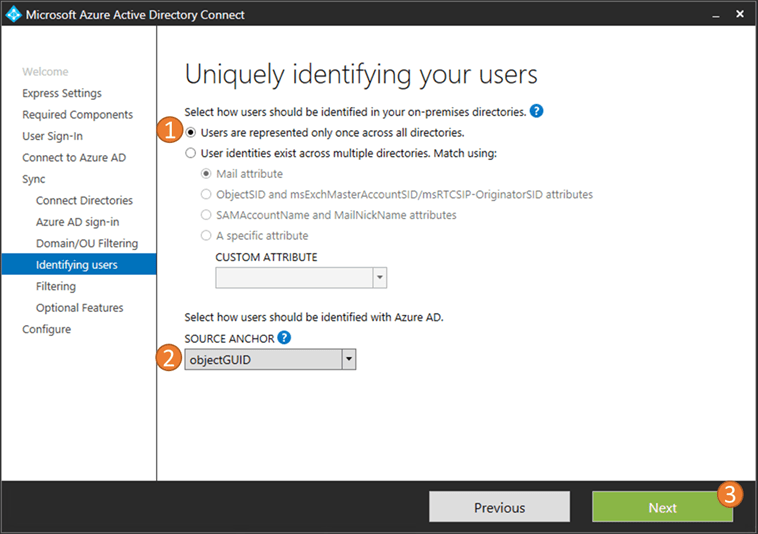
10. From the 'Uniquely identifying your users' tab, our recommendation is to leave the default settings for basic setups, of one forest, one domain, one azure AD. For more complicated setups you may want other options where you will need to match your users using a particular attribute across all directories. On the user identification option in the Azure AD we recommend leaving the default option of using the 'ObjectGUID', the system will use this to generate an ID and use it for mapping users in the system.
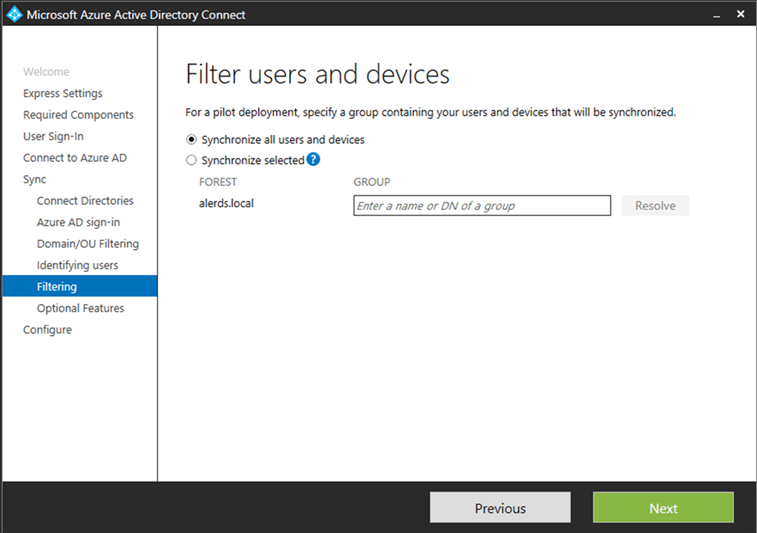
11. From the 'Filter users and devices' tab, you can sync all users and devices or you can specify a group.
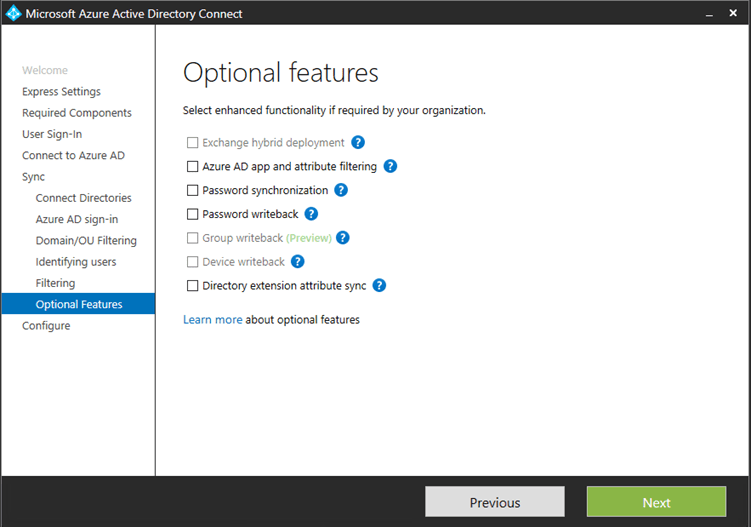
12. On the 'Optional features' tab, select any additional feature that you would like to activate. Each feature has an icon for more information on each feature.
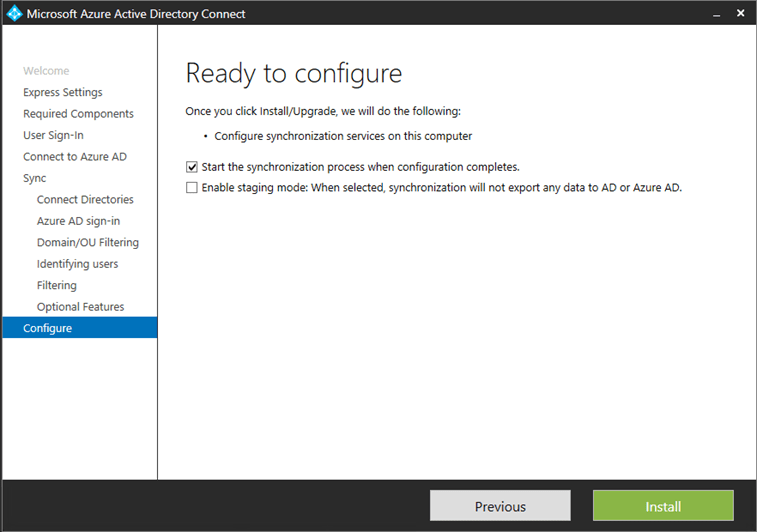
13. From the 'Ready to configure' tab, you select the 'Start the synchronization process when configuration completes' if you want to start automatically.
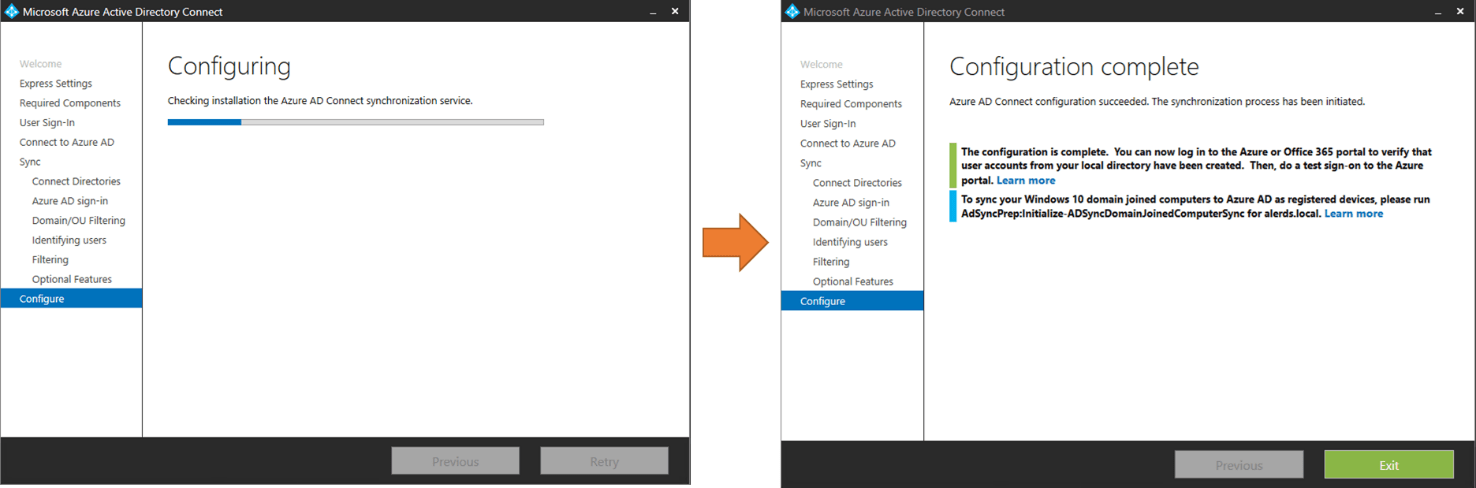
14. On the Configure view, wait until the configuration is completed and click on Exit when it’s done.
Don't want to do it yourself? Find out what it would cost to have us migrate you to the cloud:
We've got more resources for you to become a cyber-pro.

Leave us a comment!