-2.png?width=1080&height=1080&name=Untitled%20design%20(5)-2.png "bemo logo")


OneDrive for Business is one of the best cloud-based storage solutions out there. It enables us to securely store our data in the cloud, and also allows us to access that data from anywhere there’s an internet connection. Still, while Microsoft is a household name, many people feel less familiar with OneDrive for Business. Chances are, however, even if you're not familiar with its innerworkings, you've encountered it. If you or your work have any sort of Office 365 subscription, you already have OneDrive for Business. So, let's get to fully utilizing it, shall we?
Microsoft's Business Storage Solution: OneDrive for Business
The reality is, a lot of people have OneDrive for Business but many aren’t utilizing it to it’s full potential. When I talk with clients regarding Office 365, most of them feel uncertain of how to use OneDrive other than dragging and dropping files into their OneDrive Folder and guess what, my friend? There's so much more you can do! So, today, I’m going to go over some of what I think are the most useful tips & tricks to turn you into a OneDrive for Business all-star in no time. If you're curious about "the cloud" or need a little refresher, check out our blog: What is the Cloud? Plus: Cloud Pros & Cons
Table of Contents
Tip 1: Accessing Your OneDrive for Business from Multiple Locations
Tip 2: Searching for a Specific File or Folder
Tip 3: Making OneDrive for Business Files Available Offline
Tip 4: Manually Syncing Your OneDrive for Business to Your File Explorer
Tip 5: Share a OneDrive for Business File
Tip 6: Upload Files into OneDrive for Business from Your Phone
Accessing Your OneDrive for Business from Multiple Locations
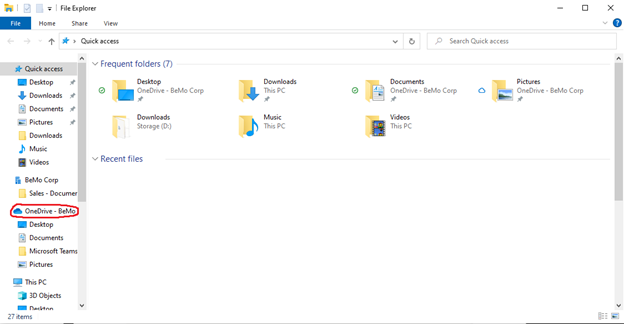
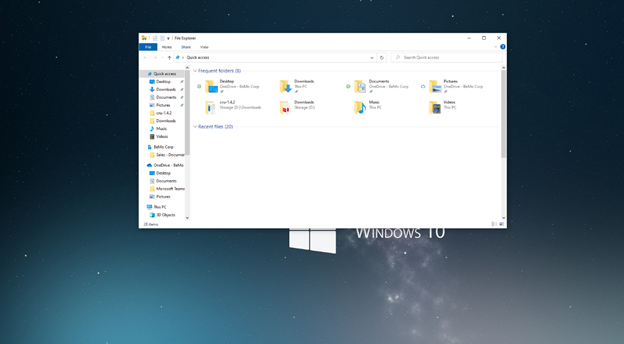
By default, when you sign-in to your Office account, it creates a corresponding OneDrive folder (circled below in red) in your File Explorer.
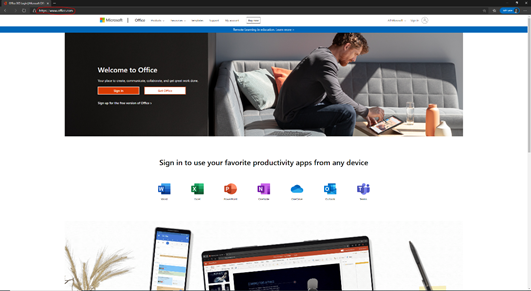
However, you can also access your OneDrive for Business from the Microsoft Office website. This is extremely useful if you need to access a specific file or folder in your OneDrive while you don’t have access your your physical computer. To access your OneDrive for Business this way, simply follow these steps:
Open up your web browser and go to www.office.com
-
Click on “sign in” in the top right of the screen.
-
Log in with your Office credentials
- Click on the OneDrive icon (indicated with the red arrow)
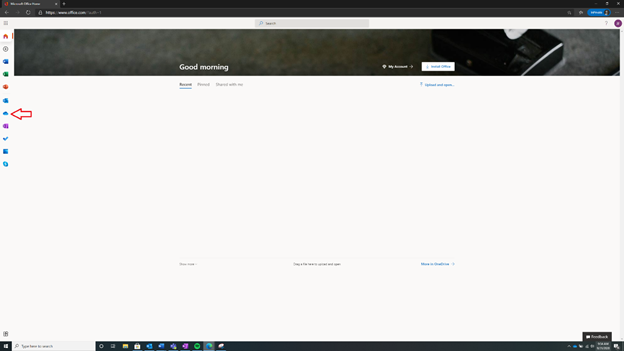
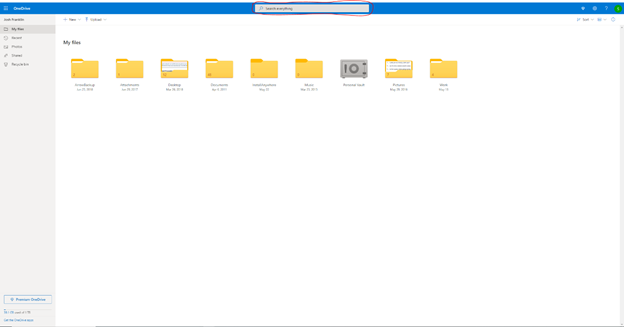
That’s it! You now have access to your entire OneDrive. You can now find any documents you have previously stored here!
Searching for a specific file or folder
Now that you know how to access your OneDrive for Business from both the file explorer and the website, I’m going to show you how to search for a specific file or folder within both. Thank you to John R., for requesting this tip! Luckily, searching for documents in both are a one-step process
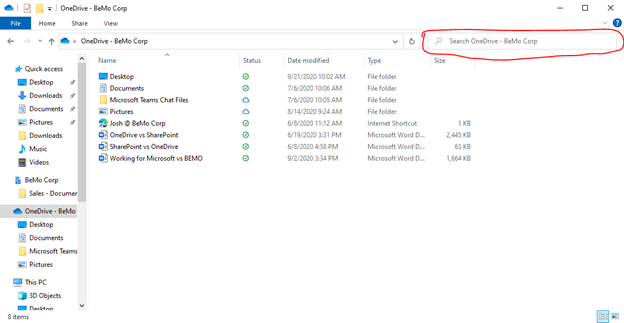
In the File Explorer, simply click on your OneDrive folder and type the name or the first few letters (if you aren't sure of the exact title) of the document you'd like to find in the search bar in the top right of the Explorer:
One The website, the process is basically the same. The only difference is that the search bar is at the top-center of the screen, instead of on the top right.
That’s it! Anything that is stored in your OneDrive will be searchable this way.
Making OneDrive for Business files available offline
As you know, OneDrive for Business files are stored in the cloud. But did you know that you can also make it so that certain files and folders are available while you’re offline? This is great if you want to work on a few documents while you’re on a plane that doesn’t have Wi-Fi access.
It's also a nice way to manage the space that files take up on your computer. Since everything doesn't have to be stored locally (on your computer), there's less clutter. For files you work on offline, any changes that you make will be synced to your OneDrive for Business the next time you connect to the internet. To make files available offline, open your File Explorer:
Navigate to your OneDrive folder on the left pane and right-click on whatever file/folder you want to make accessible offline and click on “Always keep on this device”:
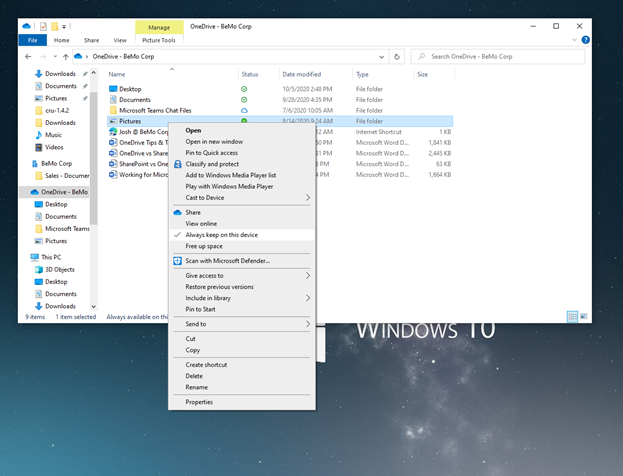
Once you do that, you should see a green circle with a check mark next to the file/folder. That means it is now available offline.
Manually syncing your OneDrive for Business to your File Explorer
In some cases, you may want to manually sync your online OneDrive for Business to your computer’s File Explorer. Reasons may be that you just purchased a new computer, or you just want to have peace of mind that everything is properly up to date and synced. To do this:
Navigate to www.office.com, sign in with your credentials, and click on the OneDrive icon as I showed you in my first tip.
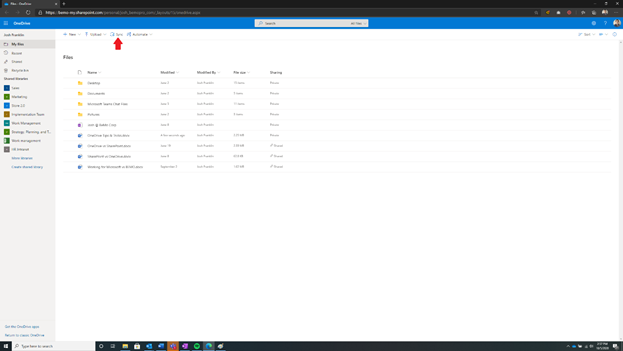
Once you are in your online OneDrive, click on the “Sync” button at the top of the screen
Once you click on it, you will get a pop up that asks if you want to sync your OneDrive to your PC. Hit “yes”, and you’re all done!
Share a OneDrive for Business file
While OneDrive for Business is technically your own personal cloud storage (wait...what?! Confused about SharePoint vs. OneDrive? 👈 Read our blog to clear it up), you ARE still able to share files and folders with other people. To do so is extremely simple. Here's how:
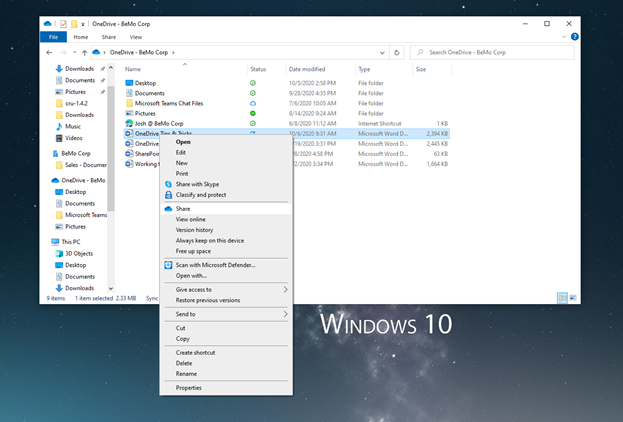
Open your File Explorer and click on your OneDrive folder. Then, find the file or folder you would like to share. Once you find the file/folder, simply right-click on it and select “Share”:
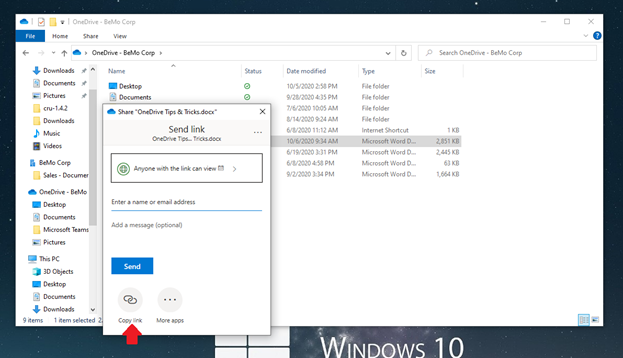
Once you click on "Share", you will see a window pop up that will let you set a few options for access, such as enabling others to edit or simply view the document, set a password to open the document, and even in some cases set an expiration date for it to be no longer be shared at. The quickest way to share the file from this point is to create a share link by clicking “Copy link”. Once you click that, you can simply send the link to whomever you want to share the document with.
Upload files into OneDrive for Business from your phone
In case you didn’t know, you can also access your OneDrive for Business from your smartphone. What’s great about this is that you don’t have to be at a computer to access and even edit documents. You can also upload documents, pictures, and videos to your OneDrive directly from your smart phone! This works with both Android & iOS, and the steps should be identical.
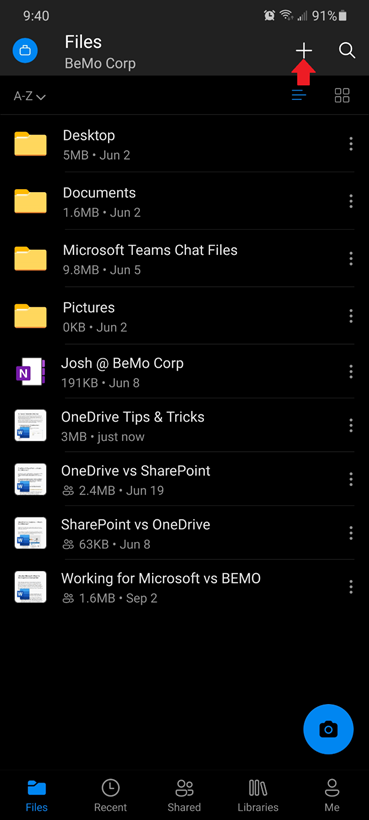
First, you need to download the OneDrive for Business app from your phone's app store. Once that’s done, click on the OneDrive for Business app to open it. Then, sign-in with your credentials:

Then, click on the “+” on the top right to add a file
After that, click “upload” and select the file you wish to upload.
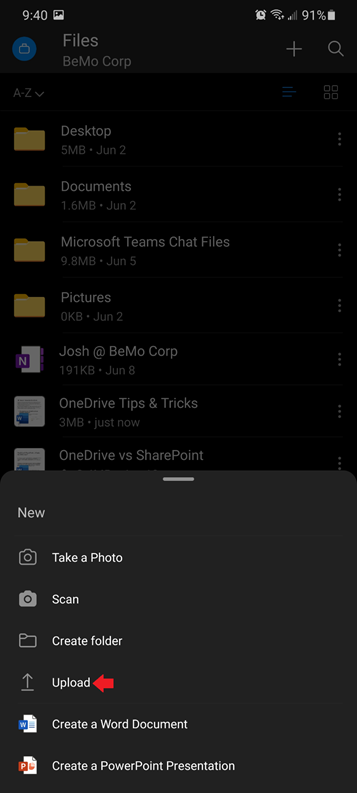
That’s it! Your file will now upload into your OneDrive, and you’ll be able to access it from anywhere. As you can see, there's also other options like "Take a Photo" or "Scan", making moving documents between devices easier than ever.
The Wrap-Up
There you have it, the 6 tips n' tricks to get you started with OneDrive for Business! I hope you’ve learned something new and can easily incorporate these tips into your daily OneDrive life. Keep in mind, these are just a few of the many things you can do with OneDrive. If you want a more in-depth overview of OneDrive for Business itself (and how it differs from SharePoint), check out our OneDrive vs. SharePoint blog.
Enjoy!
Still feeling flummoxed? Contact us in the chat in the lower right-hand corner of your screen and our BEMO team will guide you through!
Needing insight into other Microsoft tools? Reach out to us! We are always happy to take blog requests. Email julia@bemopro.com to send us yours!
Sign up & receive BEMO content right to your inbox.

Leave us a comment!